Integrating Flyway with Aurora Serverless and AWS Fargate - Part 3 - Running with Fargate

Contents
Running Flyway from AWS Fargate
Now that we are able to run our Flyway migrations on an Aurora Serverless Database, what’s next? If you’re like me, the idea of running these commands directly on your database using whatever your current version of files is might not be the most appealing, especially if the database is a production database. There can also be issues with files not being committed to a version control system like GitHub. Let’s say I fix a typo in a migration that was preventing it from running and apply that migration directly to the database without committing my changes. The next user could come along and try to run a migration but would not be allowed to by Flyway because the file checksum will not match the migration I applied. To prevent situations like this from happening, we are going to store our code in a repository on GitHub, create a Docker image to fetch the most recent code from a Git branch and apply the migrations to our Aurora Serverless Database, and run that image as a Standalone Task on AWS Fargate. When we run this image on AWS Fargate, we can also use AWS SecretsManager to retrieve secret values like our user passwords so that we do not risk accidentally committing them to the repository and creating a security vulnerability.
GitHub setup
To start off, let’s go ahead and create our repository on GitHub to store our files. I will not be going in to how to create repositories on GitHub or how to commit and upload files in this tutorial. If you would like more information on that you can find it in the docs here.
Once you have your repository created, commit the sql/ folder and docker-compose.yml file. If you still have the data/ folder, DO NOT COMMIT IT! Instead, create a .gitignore file and add a line with data on it. This will have git ignore that folder when running any commands. Before we create our Docker image, there are a few things we need to setup first.
First, we need to create a Deploy Key so our Docker image can get the latest sql code from our repository. To learn more about Deploy Keys, click here
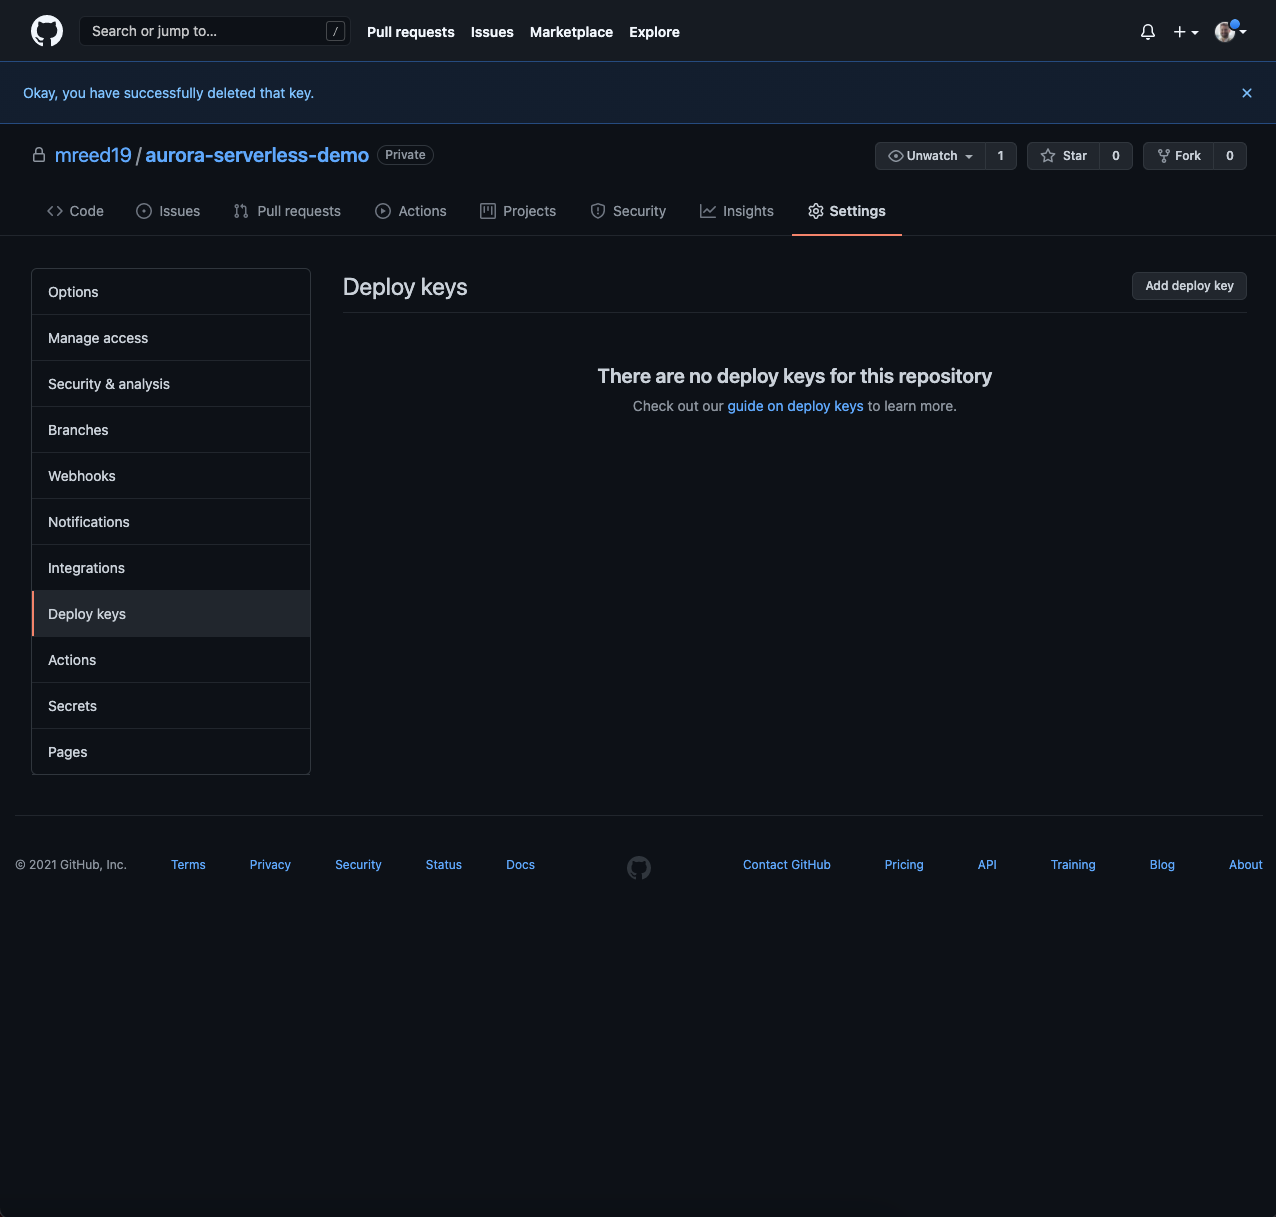
- From your GitHub repository, go to Settings.
- Select Deploy keys from the Settings menu.
- Click Add deploy key.
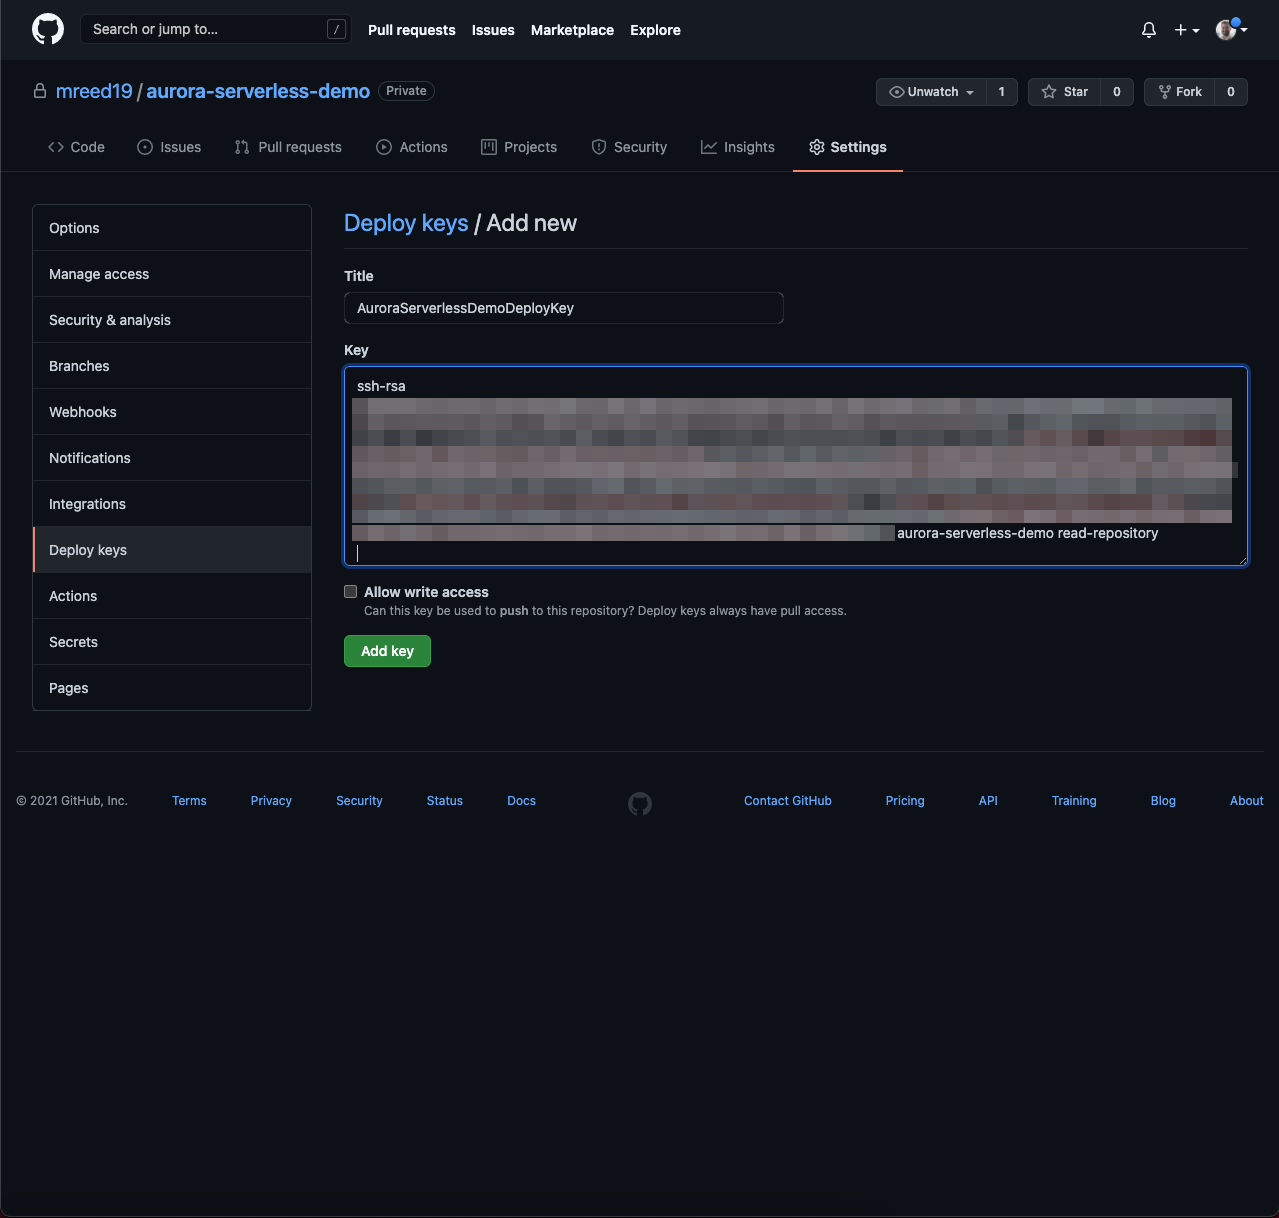
- Generate an SSH key pair.
- In a terminal run the following command. This will create a private key file with no extension and a public key file with a
.pubextension.ssh-keygen -m PEM -t rsa -b 4096 -C "<repository_name> read_repository" -f <file_path> # Ex: ssh-keygen -m PEM -t rsa -b 4096 -C "aurora-serverless-flyway-db read_repository" -f ~/key-files/aurora-serverless-flyway-db"
- In a terminal run the following command. This will create a private key file with no extension and a public key file with a
- Copy the contents of the public key file that was just generated into the Key section.
- Add a title and click Add key. Write access is not needed for this deploy key.
The next thing we need to setup is a Personal Access Token for Fargate to pull our Docker image from GitHub Packages. To create a Personal Access Token, complete the following steps:
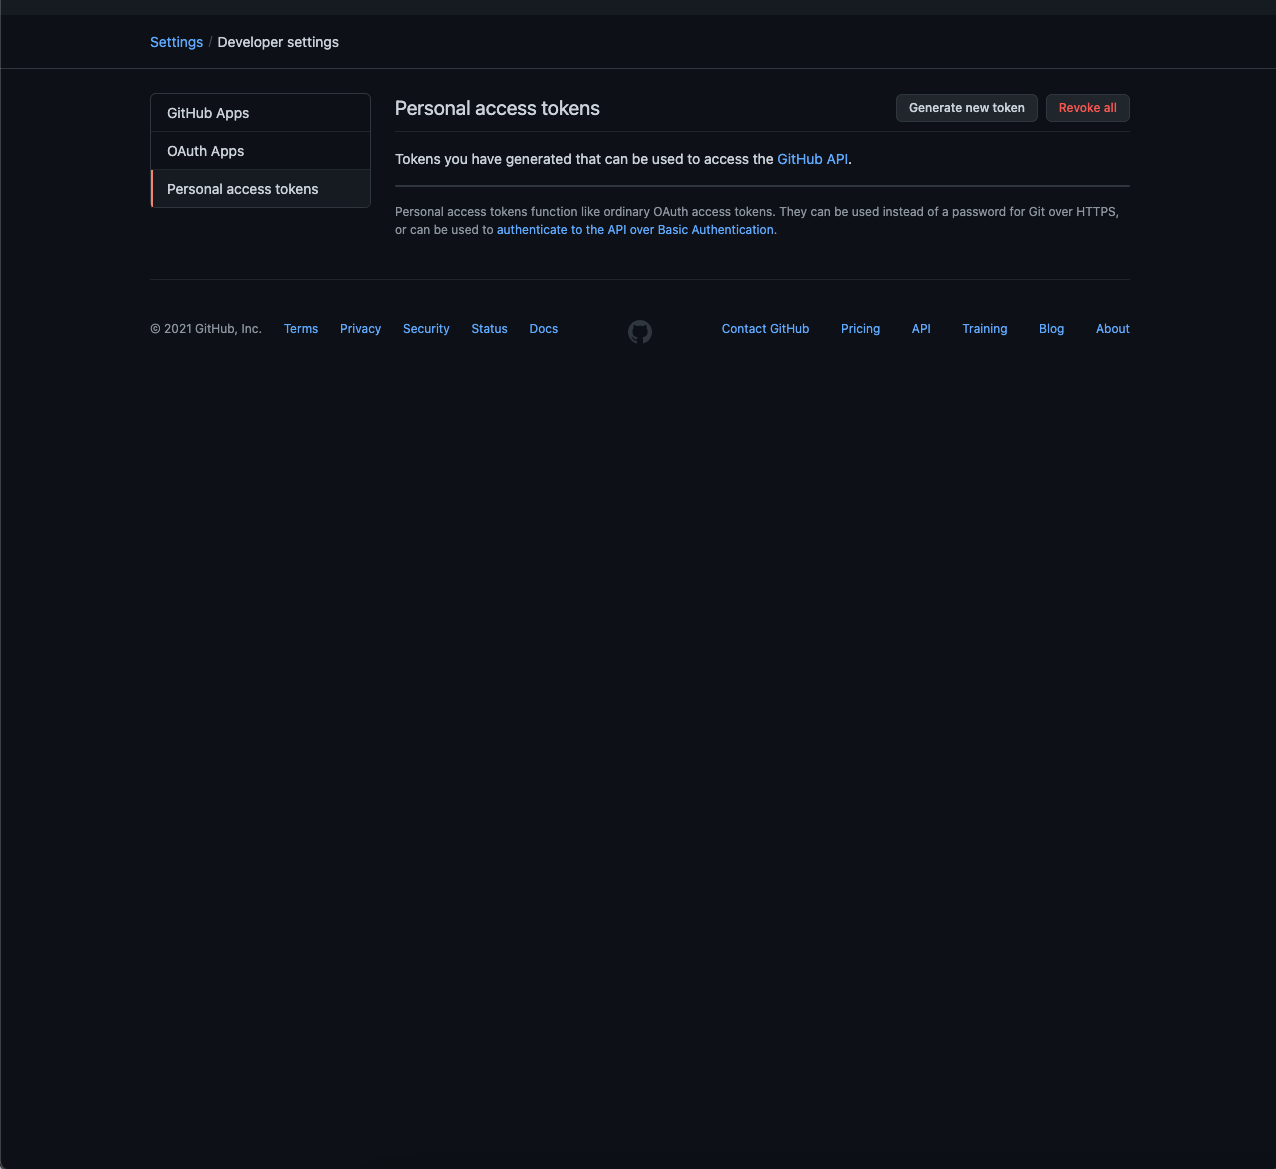
- In GitHub, click the profile picture in the top right corner and click Settings.
- Click Developer settings in the Settings menu.
- Select Personal access tokens and click Generate new token.
- Add a Note to your token to give it a name.
- Select
repoandread:packagesscopes. - Click Generate token.
- Copy the generated token and store it in a secure location. If you lose it you will have to create a new token.
- Create another token that just has
write:packagespermissions.- This token will be used to push the Docker images to the GitHub Container Registry
- To create a token with just
write:packagesand notrepo, use this link https://github.com/settings/tokens/new?scopes=write:packages.

AWS SecretsManager Setup
Next, we’ll set up our AWS SecretsManager secrets.
- Open the AWS Management Console.
- Navigate to Services -> Secrets Manager.
- Click Store a new secret.
- Select Other type of secrets.
- Under Specify the key/value pairs to be stored in this secret, select Plaintext.
- Copy and paste the contents of the private key from the deploy key pair generated in the previous section.
- Select an encryption key or use the
DefaultEncryptionKeyand click Next. - Specify a Secret name and Description for the secret and click Next.
- I like to name my secrets describing their use and separating descriptors by the
@symbol.github@<repo_owner>@<repo_path>@repository-deploy-key 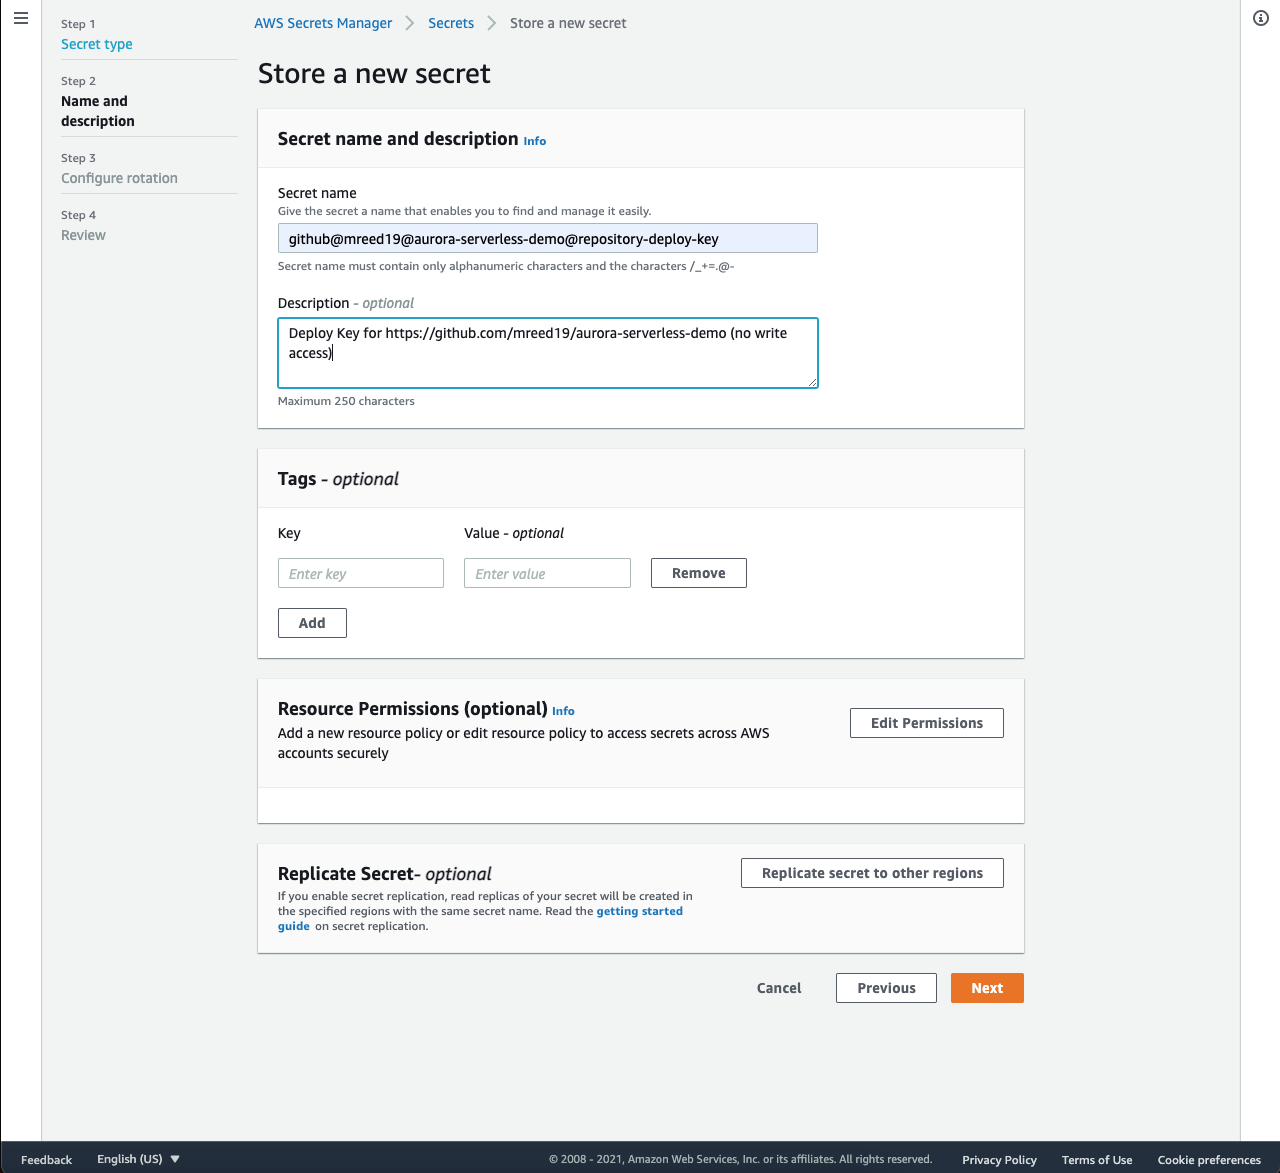
- I like to name my secrets describing their use and separating descriptors by the
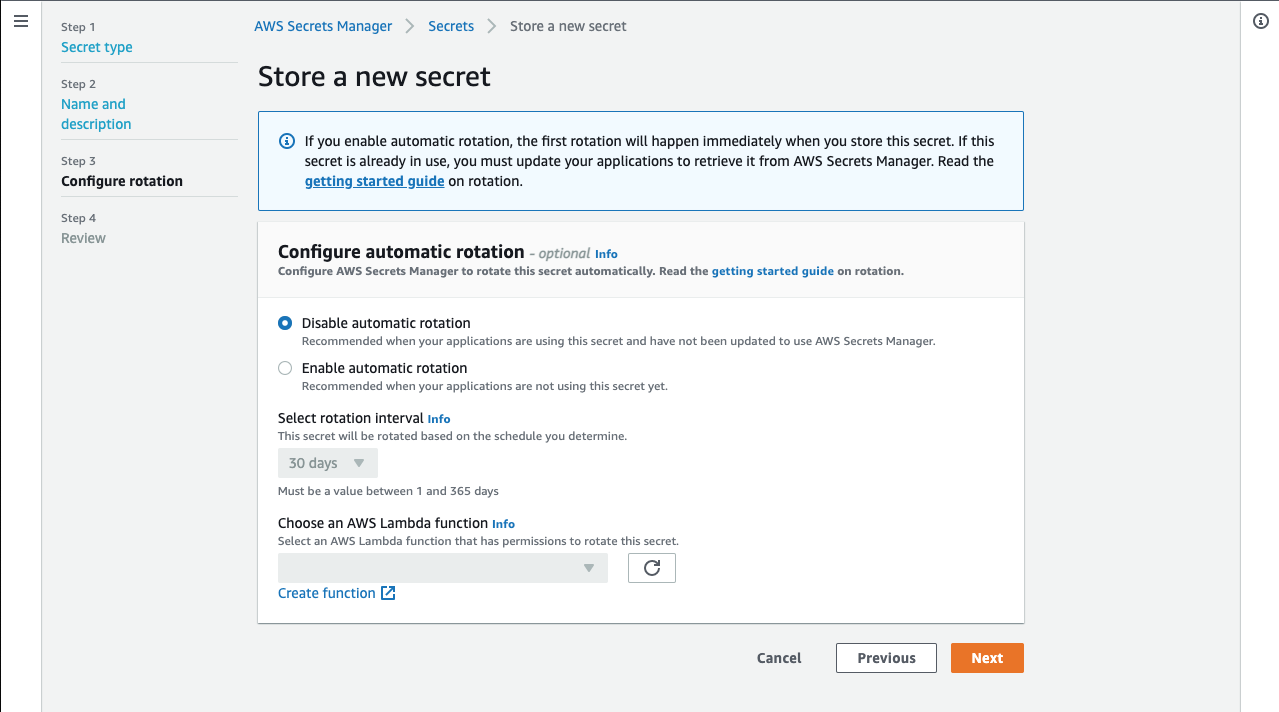
- Select Disable automatic rotation and click Next
- Review the details and click Store.
- Repeat these steps to store the Personal Access Token with
repoandread:packagespermissions created in the previous section. Instead of storing this as Plaintext, use Secrete key/value with the following key value pair- Example Secret name:
github@<username>@personal_access_token - Username:
- Key:
username - Value: your GitHub username
- Key:
- Password
- Key:
password - Value: the generated Personal Access Token
- Key:
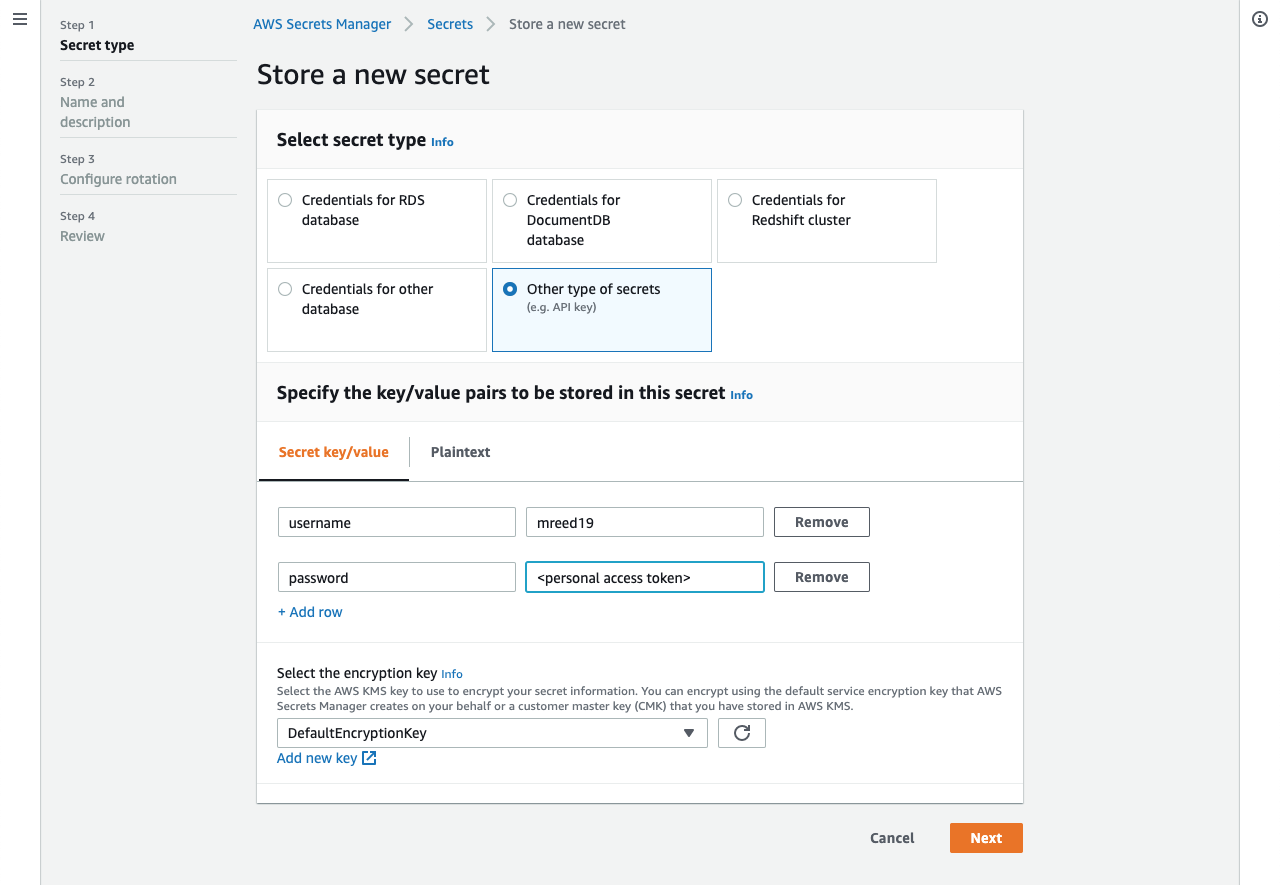
- Example Secret name:
- Repeat these steps to store the username and password key value pairs for the following Database Users.
- Example Secret name:
postgresql@aurora-serverless-flyway-db@<username> - Usernames:
- sqladmin (be sure to use the same password you used when creating the database)
- read_only (use the same password from when you previously ran the migration on the Aurora Serverless Database)
- sample_application (use the same password from when you previously ran the migration on the Aurora Serverless Database)
- Example Secret name:

Docker Image Setup
As mentioned previously, our Docker image will not only need to run Flyway, but will also need to pull our code from GitHub and retrieve our credentials from AWS SecretsManager. Once our Docker image is created, we will use GitHub Packages to store it.
To start creating our docker image, let’s create a folder called docker/. We will be adding two files here. A Dockerfile that will be used to build our image and a shell script file called flyway-rds-migration.sh. Let’s look at the Dockerfile first.
Dockerfile:
FROM openjdk:8-jre-alpine

RUN apk update && apk upgrade && \
  apk add --update --no-cache \
  bash \
  curl \
  jq \
  git \
  openssh \
  python \
  py-pip

RUN pip install --upgrade awscli && apk -v --purge del py-pip

COPY . /flyway

WORKDIR /flyway

ENV FLYWAY_VERSION 7.9.1

RUN wget https://repo1.maven.org/maven2/org/flywaydb/flyway-commandline/${FLYWAY_VERSION}/flyway-commandline-${FLYWAY_VERSION}.tar.gz && \
  tar -xzf flyway-commandline-${FLYWAY_VERSION}.tar.gz && \
  mv flyway-${FLYWAY_VERSION}/* . && \
  rm flyway-commandline-${FLYWAY_VERSION}.tar.gz

ENTRYPOINT ["./flyway-rds-migration.sh"]
This Dockerfile uses the OpenJDK project’s image that has Java JRE Version 8 on it. It then adds several command line tools, including the AWS CLI, that we will make use of in our script to interact with GitHub, AWS SecretsManager, and our Aurora Serverless Database. Then, it copies the other files in the docker/ directory to the image, giving it access to our script. After that, it installs Flyway and sets the entrypoint command for our image to be the flyway-rds-migration.sh script that we are about to create. Using entrypoint means this command will always run when using our image and any additional arguments to running our image will be appended after the entrypoint arguments.
Now for the flyway-rds-migration.sh script. Be sure to change <repo_owner> and <repo_path> to the values for your GitHub repository.
flyway-rds-migration.sh
#!/usr/bin/env bash

# Variables in all caps are environment variables that will be
# provided by the Fargate Task Definition

# Optional Branch argument that can be specified by Fargate Task Definition
# defaults to master if no value is provided
github_branch="${1:-master}"

echo "Starting Fargate task to run Flyway migration from ${github_branch} for RDS database ${DB_NAME} in AWS Region ${REGION}"

# Get Repository Deploy Key to pull SQL code from GitHub
mkdir ~/.ssh
aws secretsmanager get-secret-value \
  --secret-id "${REPOSITORY_DEPLOY_KEY_SECRET}" \
  --region "${REGION}" \
  --query SecretString \
  --output text \
> ~/.ssh/id_rsa
chmod 0600 ~/.ssh/id_rsa
ssh-keyscan github.com >> ~/.ssh/known_hosts

# Clone GitHub branch to get access to SQL migrations
# CHANGE <repo_owner> AND <repo_path> TO YOUR GITHUB REPOSITORY!
git clone --single-branch -b "${github_branch}" "git@github.com:<repo_owner>/<repo_path>.git"
cd "<repo_path>"

# Get DB user Passwords
# CHANGE the secret-ids here to match the ones you created in the previous section
sqladmin_password=$(
  aws secretsmanager get-secret-value \
    --secret-id postgresql@aurora-serverless-flyway-db@sqladmin \
    --region "${REGION}" \
    --query SecretString \
    --output text \
  | jq -r '.password'
)
read_only_password=$(
  aws secretsmanager get-secret-value \
    --secret-id postgresql@aurora-serverless-flyway-db@read_only \
    --region "${REGION}" \
    --query SecretString \
    --output text \
  | jq -r '.password'
)
sample_application_password=$(
  aws secretsmanager get-secret-value \
    --secret-id postgresql@aurora-serverless-flyway-db@sample_application \
    --region "${REGION}" \
    --query SecretString \
    --output text \
  | jq -r '.password'
)

# Set flyway config options
flyway_options=(
  "-url=jdbc:postgresql://${DB_HOST}:5432/${DB_NAME}"
  "-user=sqladmin"
  "-password=${sqladmin_password}"
  "-locations=filesystem:./sql"
  "-placeholders.DATABASE_NAME=${DB_NAME}"
  "-placeholders.READ_ONLY_PASSWORD=${read_only_password}"
  "-placeholders.SAMPLE_APPLICATION_PASSWORD=${sample_application_password}"
)

# Run flyway migration. Display schema version details before and after migration.
/flyway/flyway "${flyway_options[@]}" info
/flyway/flyway "${flyway_options[@]}" migrate
/flyway/flyway "${flyway_options[@]}" info
With this script created, we are able to to specify it as the command for our Docker image to run. When we create out fargate task, we will do this along with specifying the environment variables for REGION, REPOSITORY_DEPLOY_KEY_SECRET, REPOSITORY_OWNER, REPOSITORY_PATH, DB_HOST and DB_NAME.
We are now ready to build our Docker image and push it to GitHub Packages for the repository. Run these commands to build and push the image. Replace <repo_owner> with your GitHub username and <repo_path> with the name of your repository.
First, login to the GitHub Packages docker repository. Use the Personal Access Token you generated with write:packages permissions as the password.
docker login ghcr.io
Then, build and tag your docker images and push them to the repository.
# Build docker image
docker build -t "ghcr.io/<repo_owner>/<repo_path>/flyway:1.0.0" ./docker

# Create a latest tag
docker tag "ghcr.io/<repo_owner>/<repo_path>/flyway:1.0.0" "ghcr.io/<repo_owner>/<repo_path>/flyway:latest"

# Push images to GitHub Packages
docker push "ghcr.io/<repo_owner>/<repo_path>/flyway:1.0.0"
docker push "ghcr.io/<repo_owner>/<repo_path>/flyway:latest"
If this is successful you should see an entry under the Packages tab of your GitHub profile page. If you ever need to make any changes to the Dockerfile or the flyway-rds-migration.sh script (Ex: adding DB users and fetching their credentials), you will have to build and push the new image. You can use a new version if you need to keep the old one or you can have it overwrite the version. If you change versions you will also need to update the Fargate task definition that we will be creating. Go ahead and commit the docker/ folder to your repository so you can more easily track when changes need to be made to the image.
Fargate Setup
Now that we have our Docker image created to run Flyway on our Aurora Serverless Database, it is time for us to setup our Fargate Task. This includes setting up an IAM role with the permissions our task will need, creating an ECS Cluster to run our task from, and creating the task definition that we will use to run our task.
First, let’s create our IAM role.
- Open the AWS Console and navigate to IAM.
- Select Roles from the IAM menu.
- Click Create role.
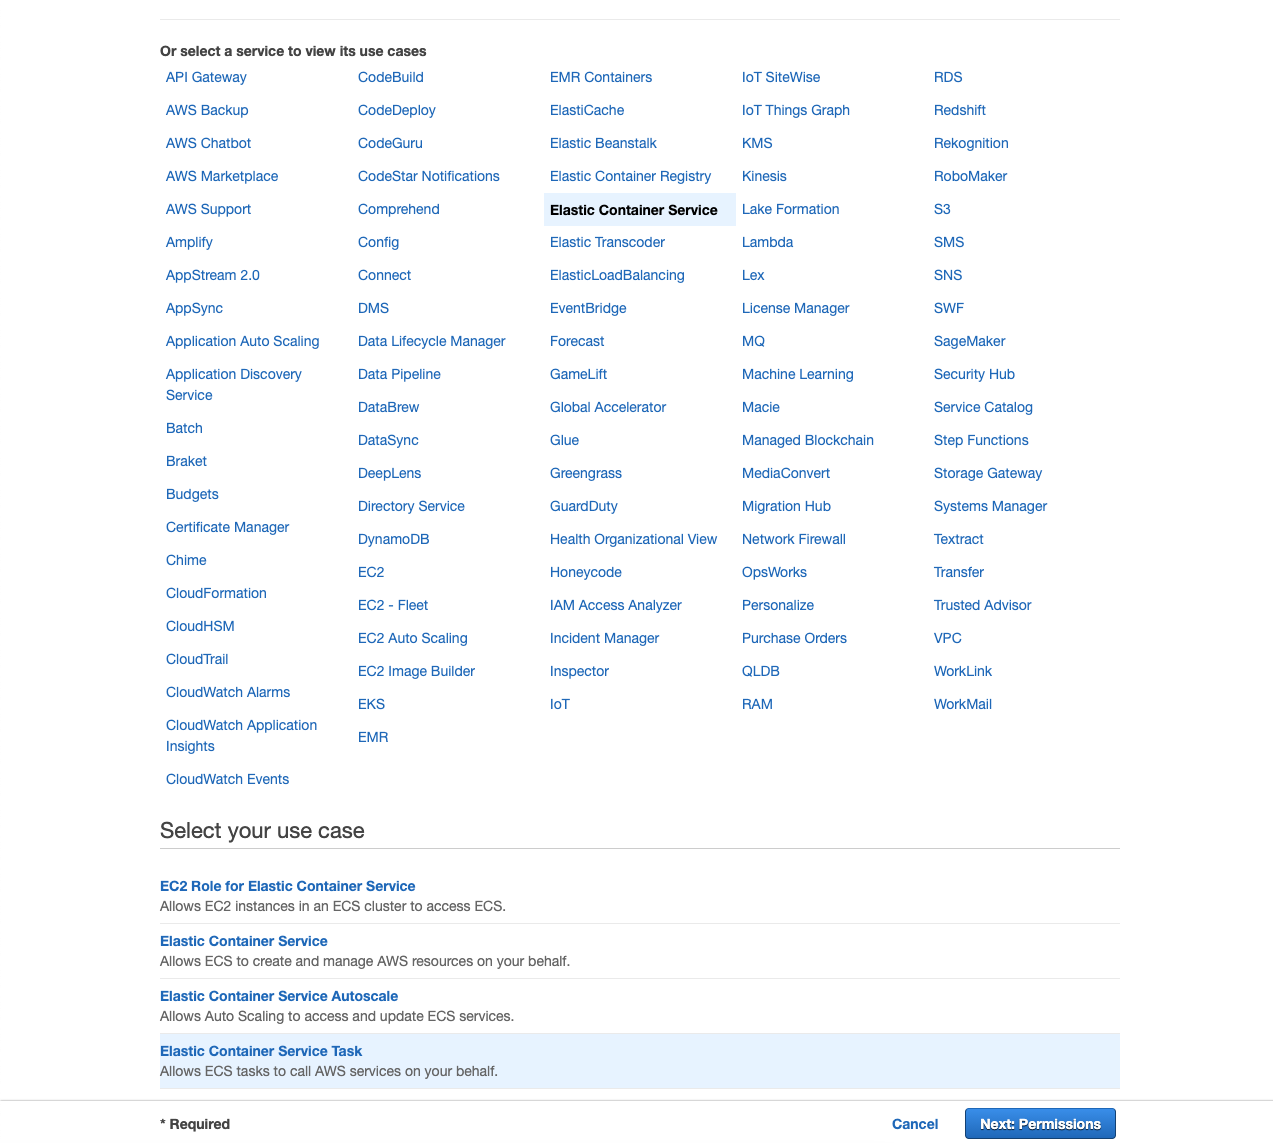
- Under Select type of trusted entity, select AWS service.
- Under Choose a use case, select Elastic Container Service from the list of services.
- Under Select your use case, select Elastic Container Service Task.
- Click Next: Permissions.
- Under Attach permissions policies, click Create policy. This should open the IAM policy creator in a new tab.
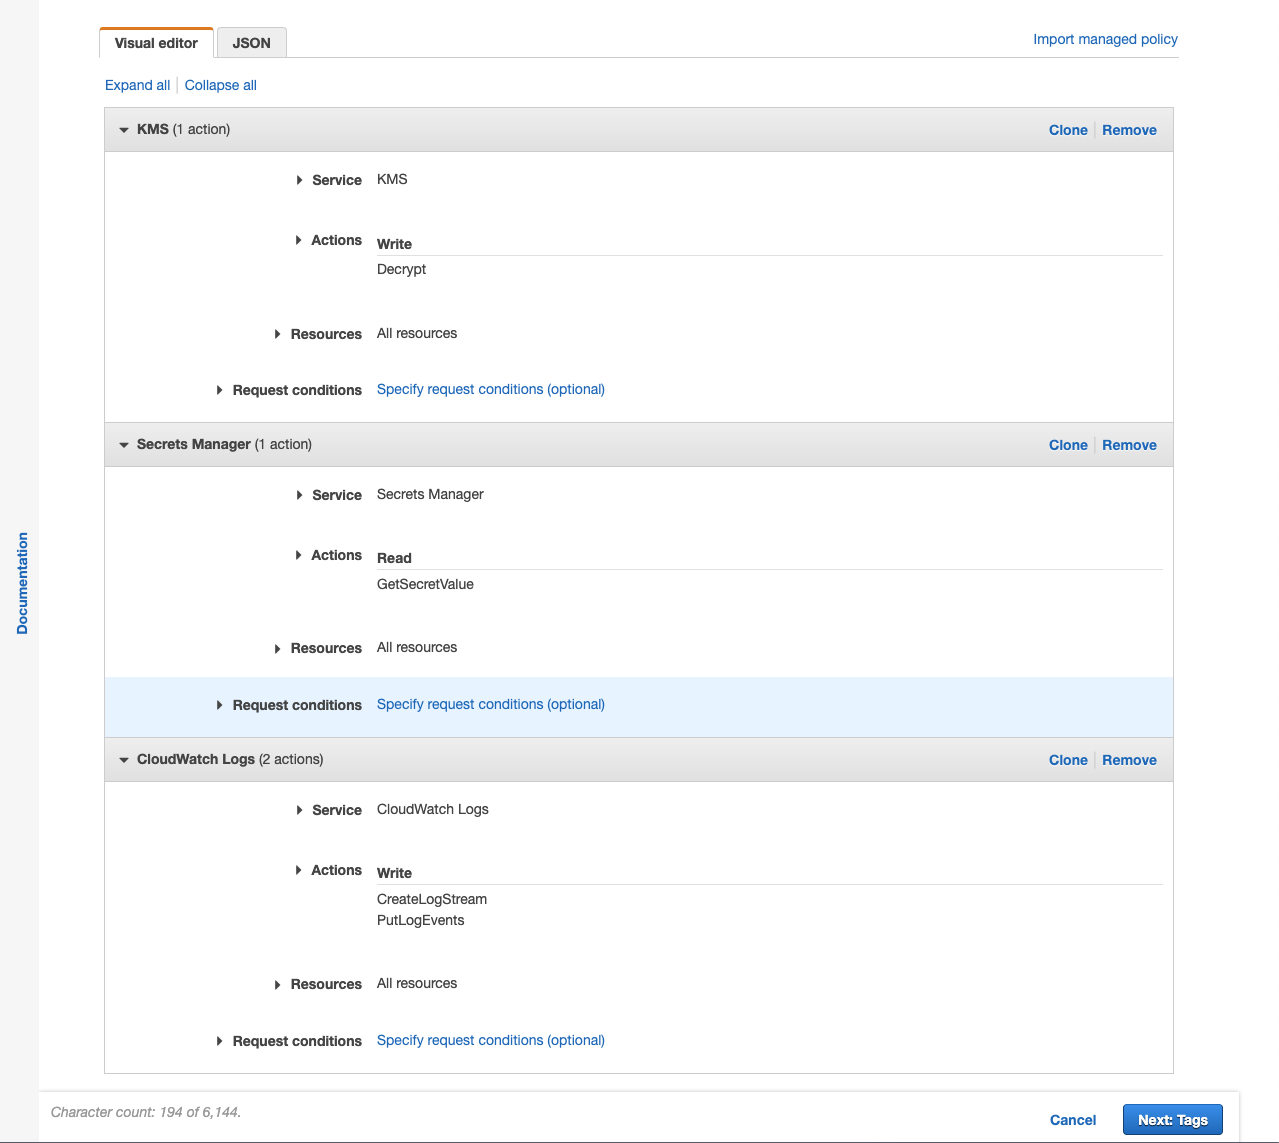
- Add the following permissions:
- KMS - Write - Decrypt
- Secrets Manager - Read - GetSecretValue
- CloudWatch Logs - Write - CreateLogStream and PutLogEvents
- If using the JSON policy editor
{
  "Version": "2012-10-17",
  "Statement": [
    {
      "Sid": "FargateFlywayPermissions",
      "Effect": "Allow",
      "Action": [
        "kms:Decrypt",
        "secretsmanager:GetSecretValue",
        "logs:CreateLogStream",
        "logs:PutLogEvents"
      ],
      "Resource": "*"
    }
  ]
}
- If using the JSON policy editor
- Click Next: Tags.
- Add any tags you would like and click Next: Review.
- Specify a Name and Description.
- Name:
FargateFlywayPolicy - Description:
Necessary permissions for running Flyway from Fargate. KMS Decrypt, Secrets Manager GetSecretValue, and Cloudwatch Logs CreateLogStream and PutLogEvents 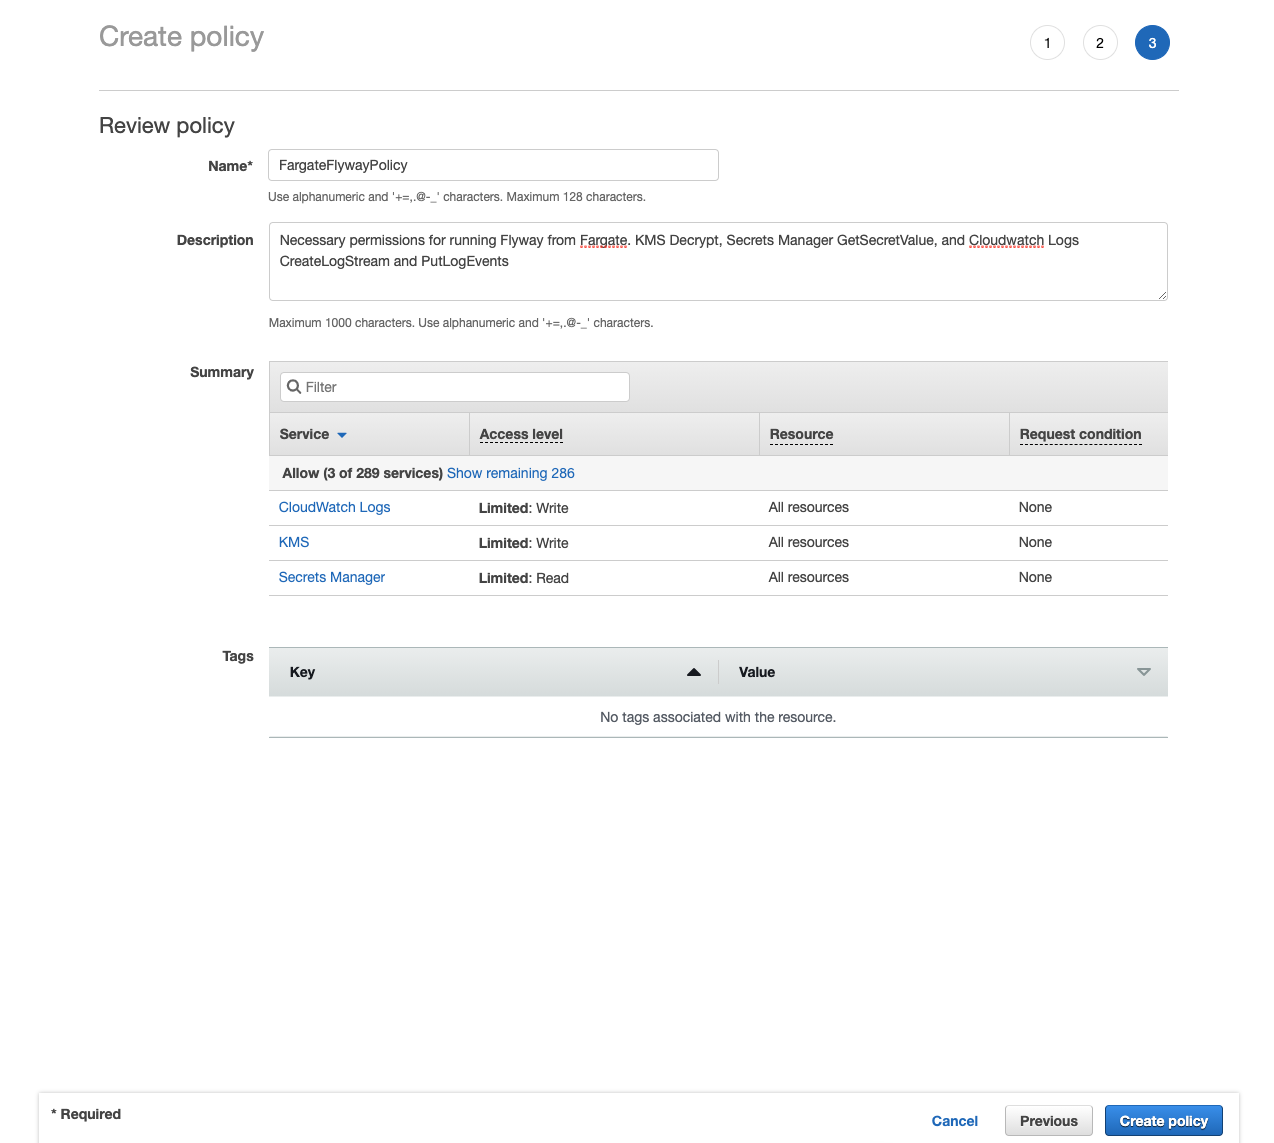
- Name:
- Click Create policy.
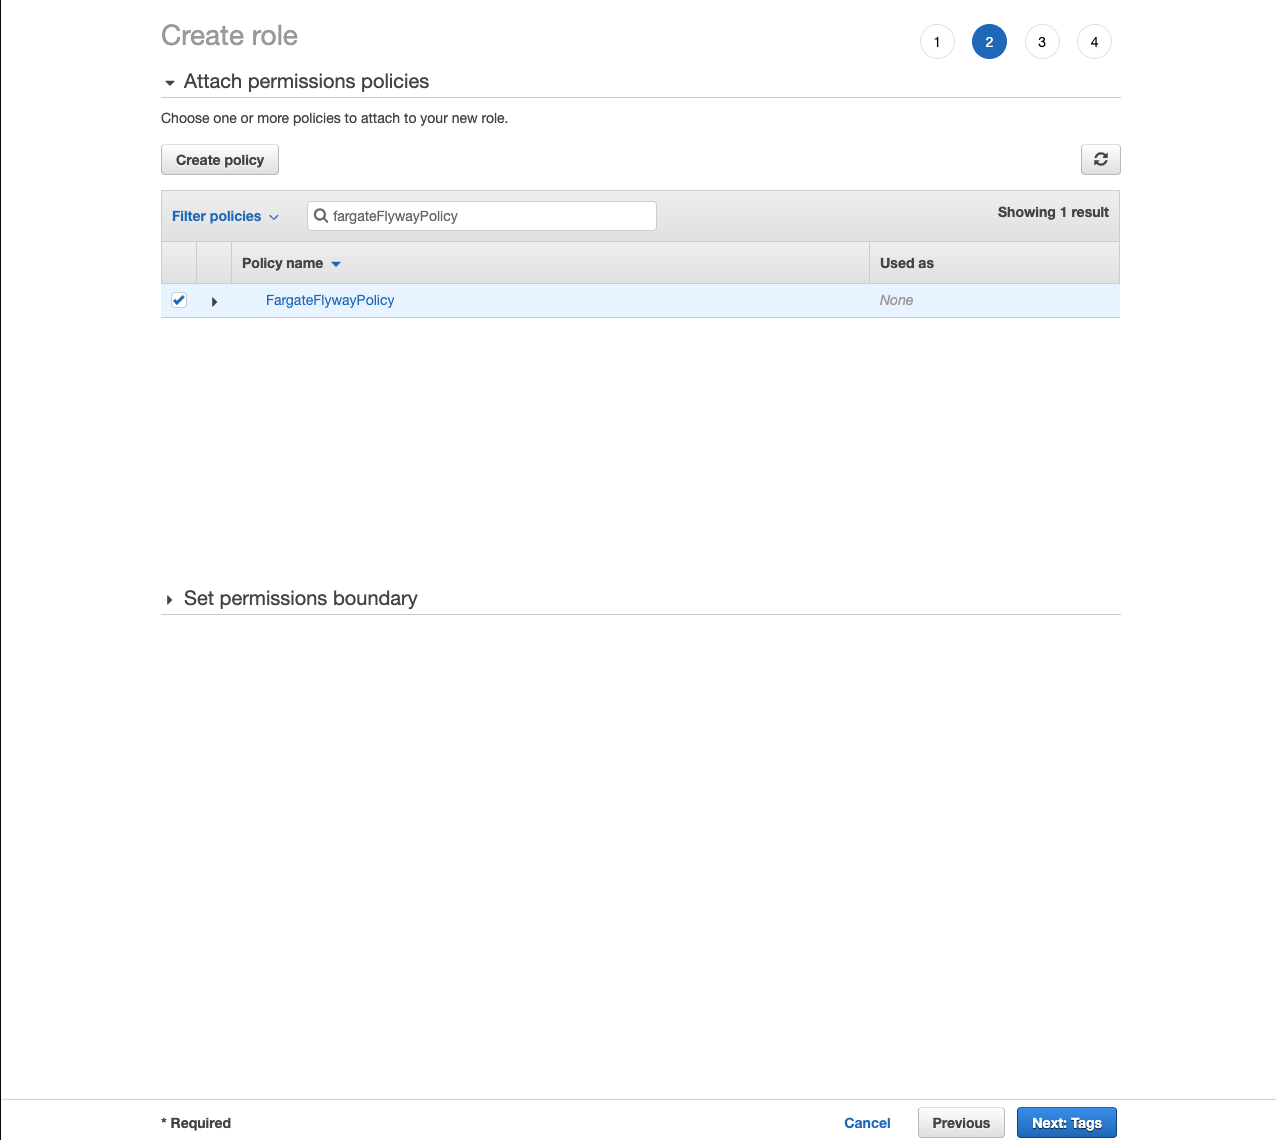
- Return to the Create role tab and refresh the policy list.
- Search for your FargateFlywayPolicy and select it.
- Click Next: Tags.
- Add any tags you would like and click Next: Review.
- Specify a Role name and Description.
- Role name:
FargateFlywayRole - Description:
IAM Role for running Flyway from Fargate. Has KMS Decrypt, Secrets Manager GetSecretValue, and Cloudwatch Logs CreateLogStream and PutLogEvents permissions. 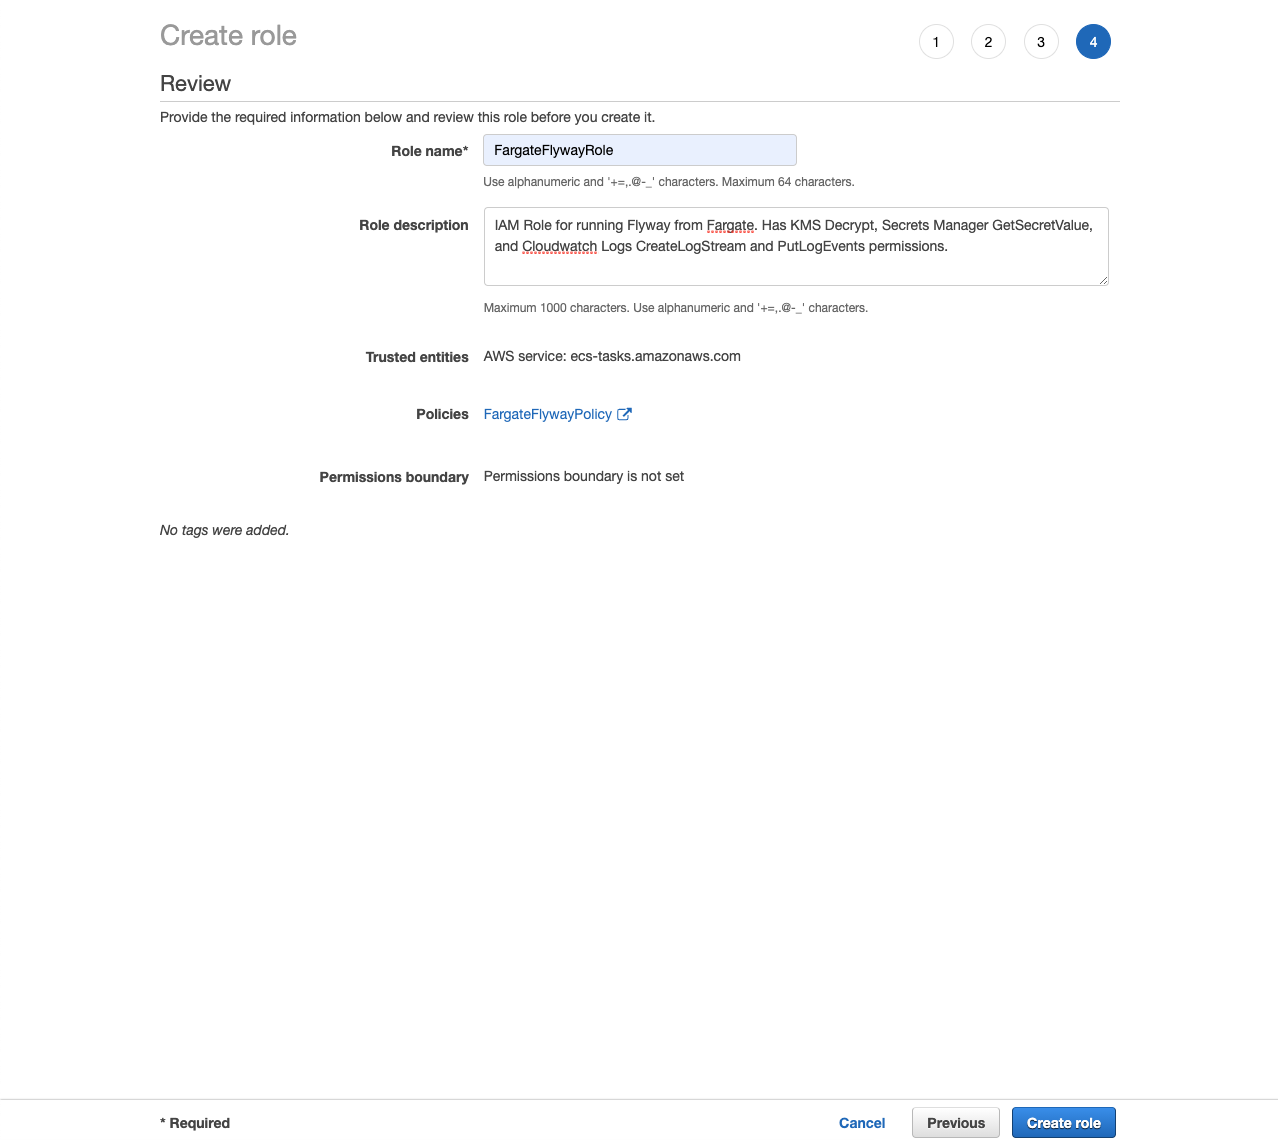
- Role name:
- Click Create role.
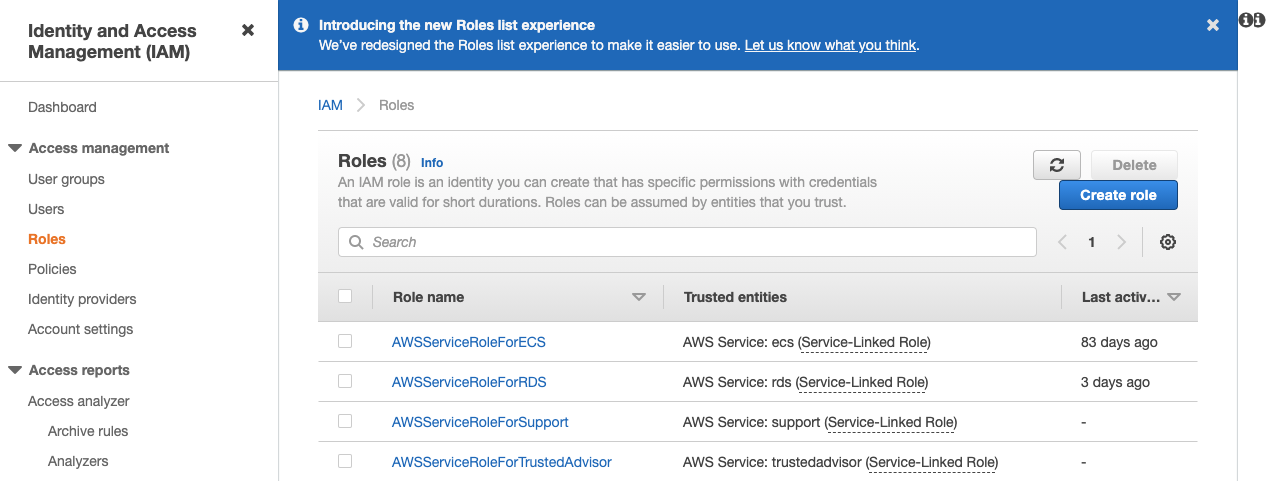
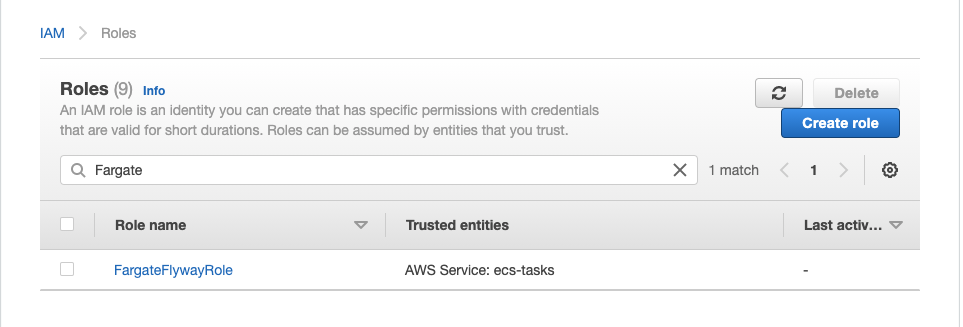
You should be able to see your IAM role in the list of roles now.
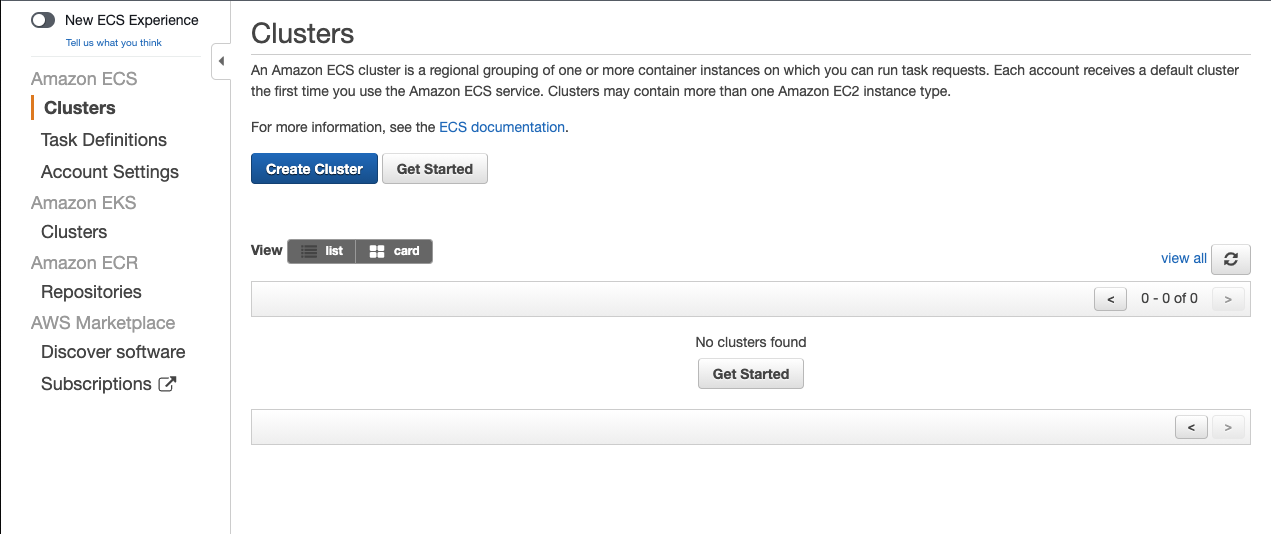
Let’s proceed to creating our ECS cluster.
- Navigate to ECS or Elastic Container Service.
- From the Amazon ECS menu, select Clusters.
- Click Create Cluster.
- For Select cluster template, choose Networking only.
- This one should say For use with either AWS Fargate or External Instance capacity.
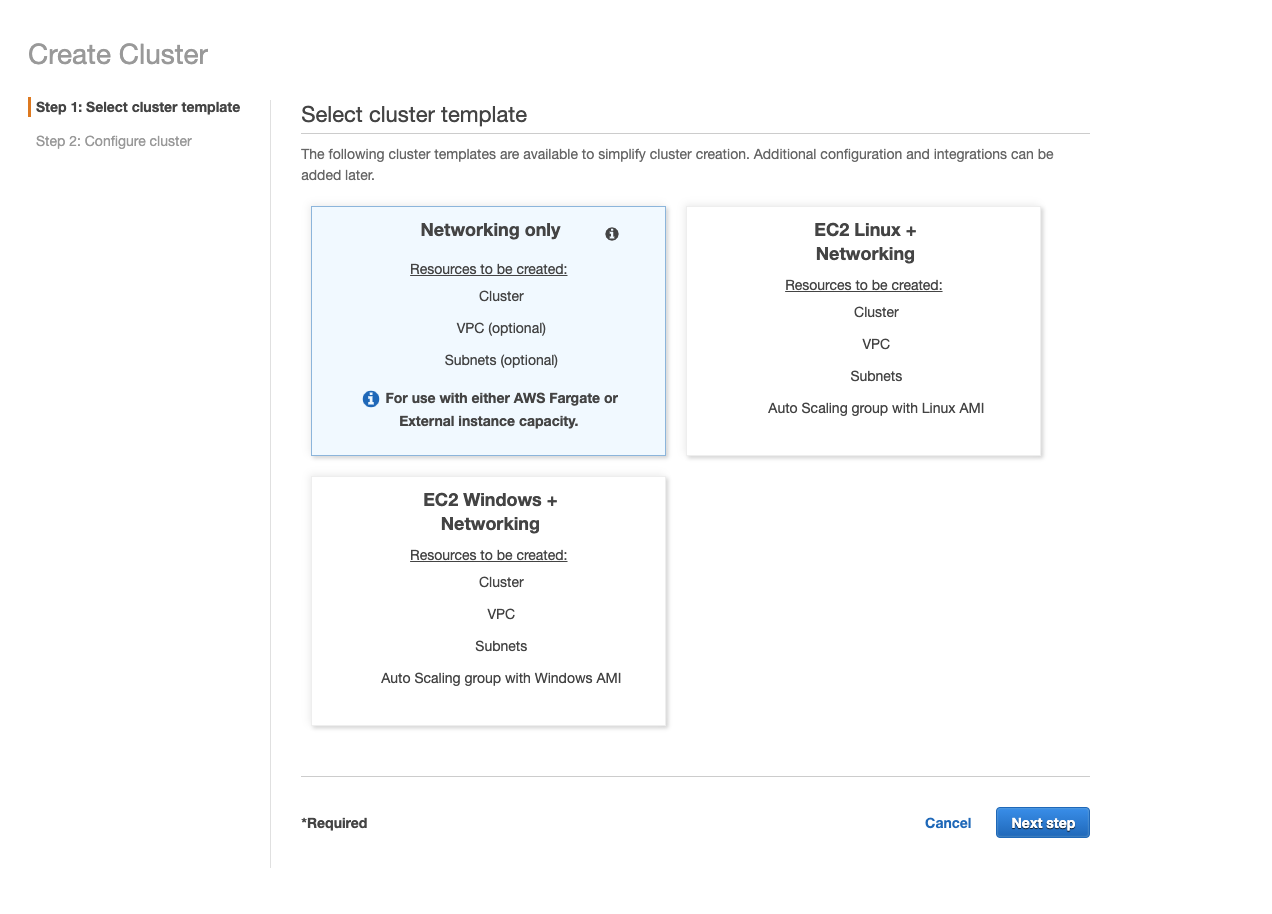
- Click Next step.
- Specify a Cluster name.
- Example:
aurora-serverless-flyway-cluster 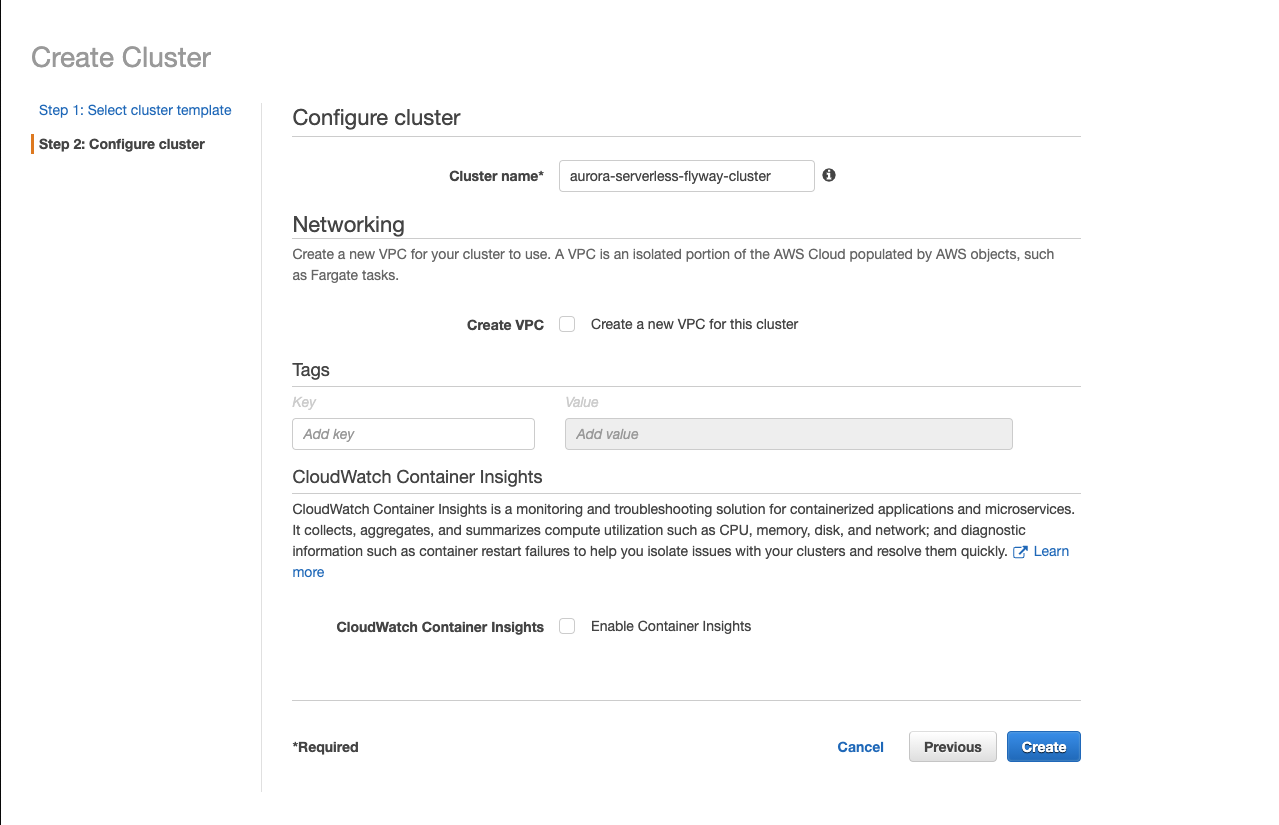
- Example:
- Add any tags you would like.
- Click Create.
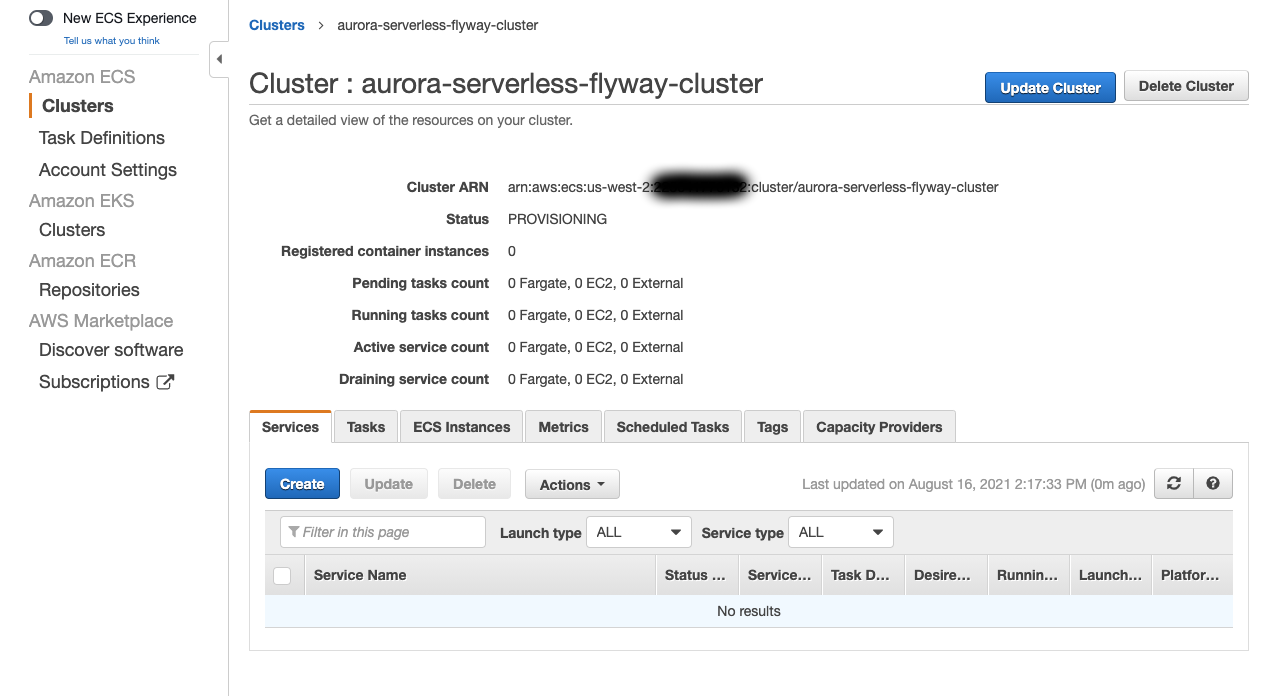
- Click View Cluster.
Now, we will create our task definition for our Flyway Fargate task. Fargate gives us the advantage of not having EC2 instances to manage.
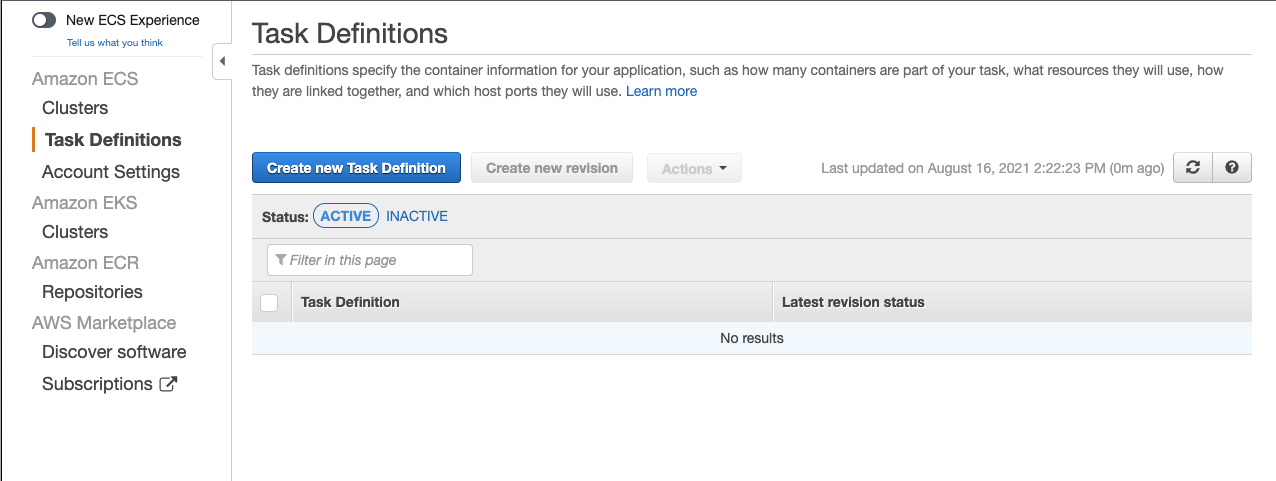
- In the Amazon ECS menu, select Task Definitions.
- Click Create new Task Definition.
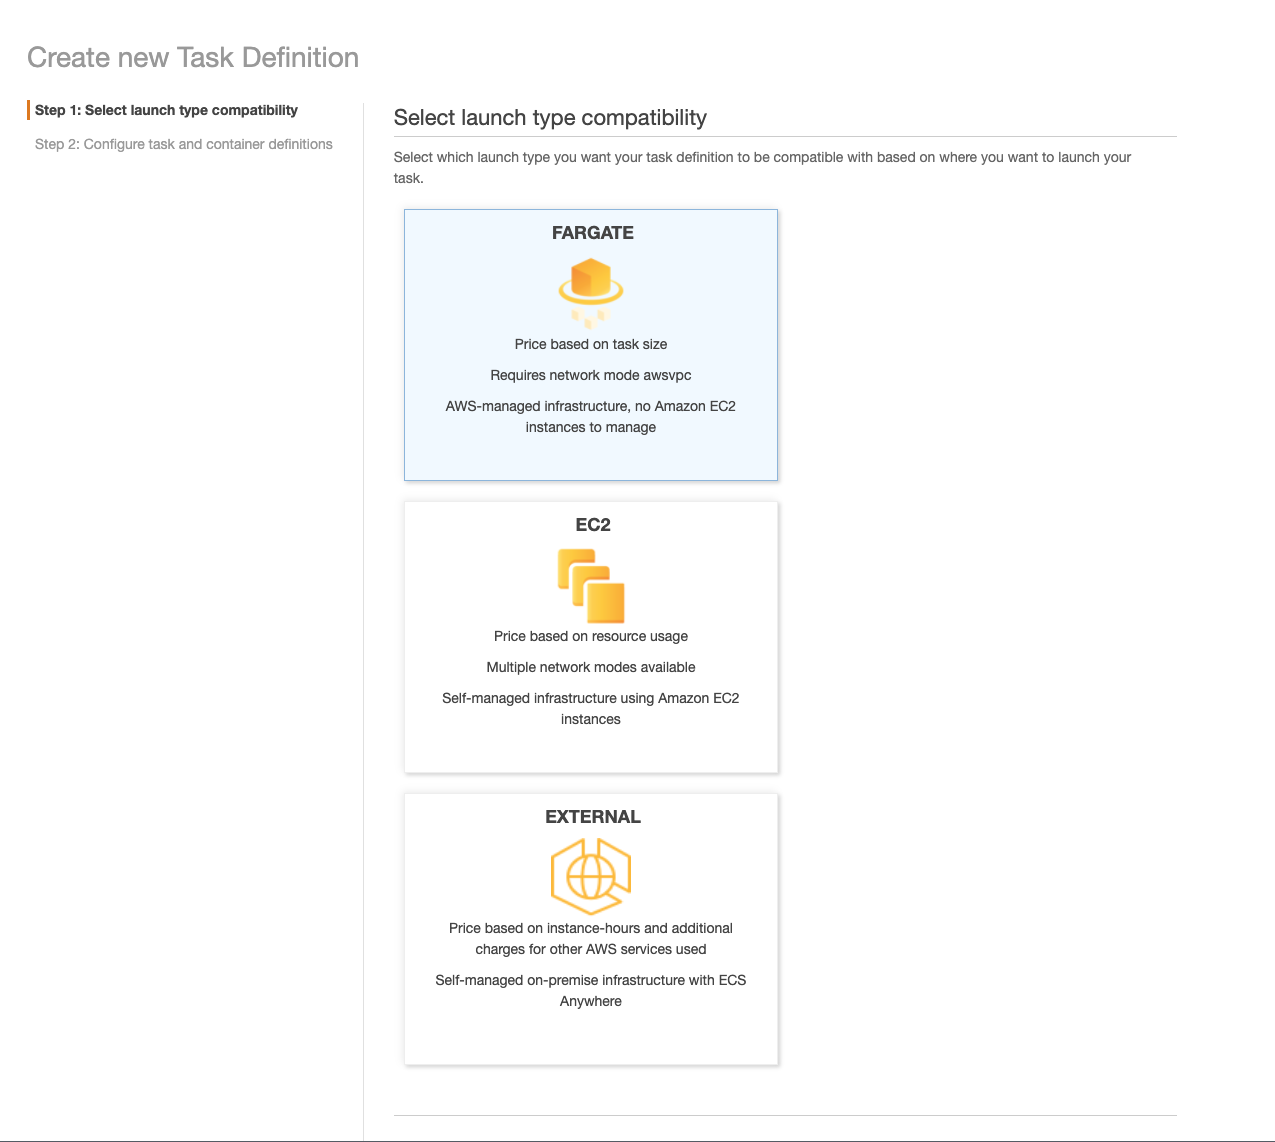
- Under Select launch type compatibility, select Fargate.
- Click Next step.
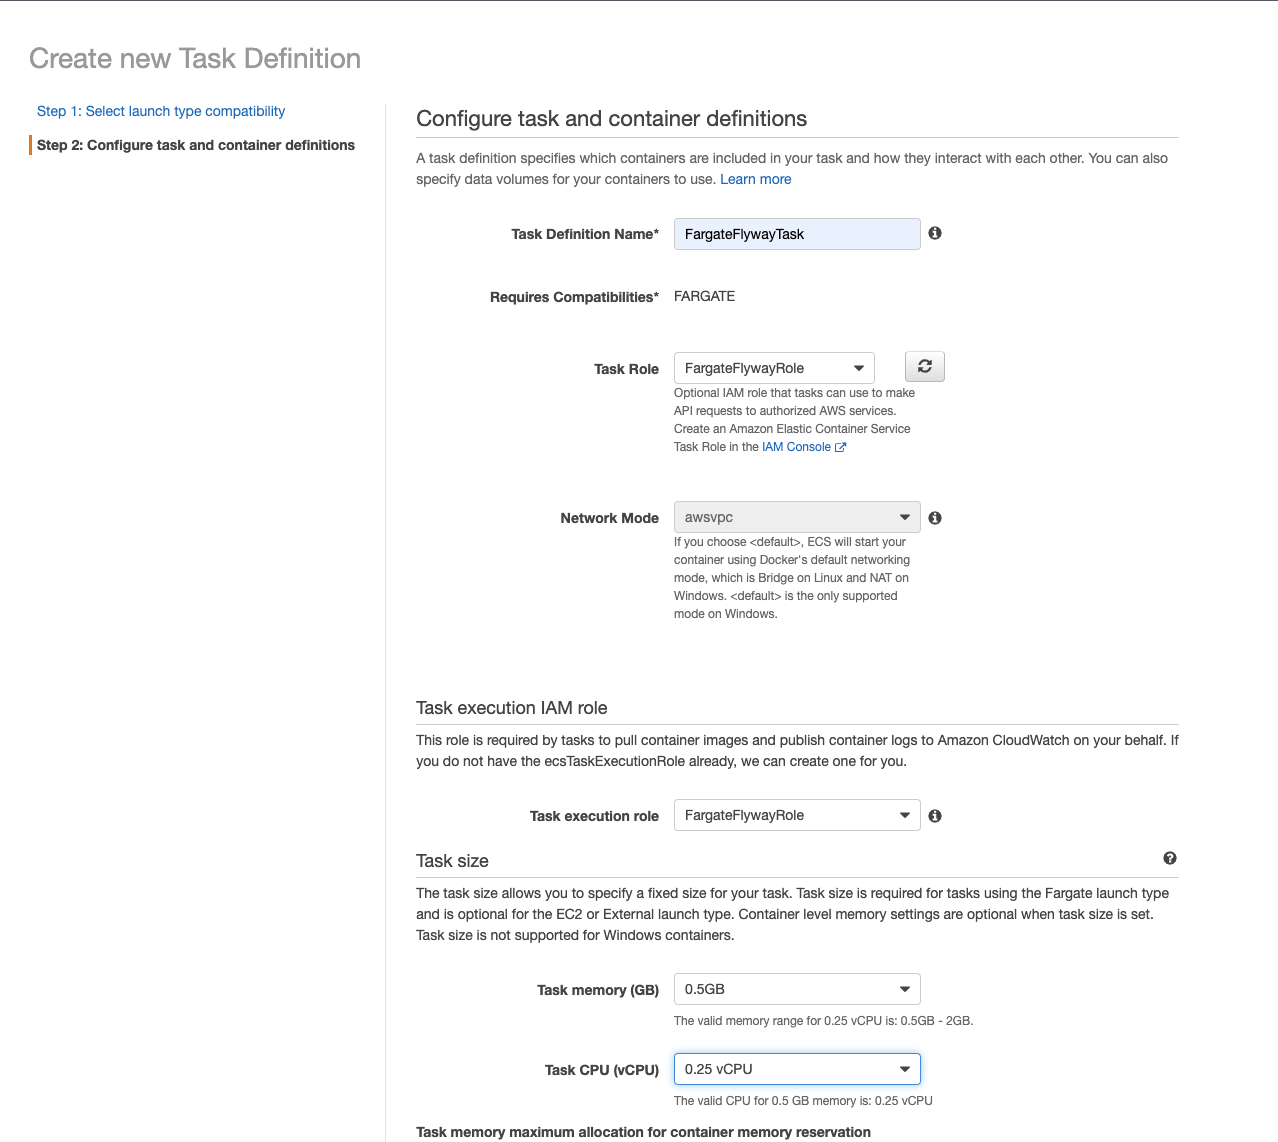
- Enter a Task Definition Name.
- Ex:
FargateFlywayTask
- Ex:
- For Task Role, select the IAM role we just created.
- For Task execution role, select the IAM role we just created.
- For Task memory (GB), select 0.5GB.
- For Task CPU (vCPU), select 0.25 vCPU.
- Under Container Definitions, click Add container.
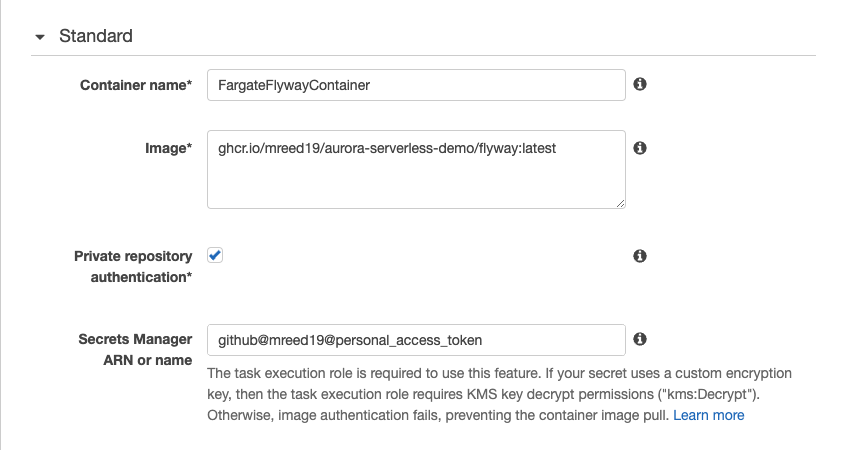
- Specify a Continer name.
- Ex:
FargateFlywayContainer
- Ex:
- For Image, use the same path you pushed your docker image to for GitHub Packages. This can be a versioned image or
latest. If you use a version you might need to update the task definition if you push a new docker image version.- Ex:
ghcr.io/<repo_owner>/<repo_path>/flyway:1.0.0
- Ex:
- Check Private repository authentication.
- For Secrets Manager ARN or name, enter the secret name storing the Personal Access Token.
- Under Advanced container configuration in the ENVIRONMENT section, add the following Environment variables
- REGION
- Key:
REGION - Value: The AWS region you are operating in. Ex:
us-west-2
- Key:
- REPOSITORY_DEPLOY_KEY_SECRET
- Key:
REPOSITORY_DEPLOY_KEY_SECRET - Value: The secret name storing the Deploy Key private key.
- Key:
- DB_HOST
- Key:
DB_HOST - Value: The endpoint for your Aurora Serverless Database.
- Key:
- DB_NAME
- Key:
DB_NAME - Value: The name of the PostgreSQL database to run your migration on. It should be the value you specified for Initial database name when creating your Aurora Serverless Database. Ex:
aurora_serverless_flyway_db.
- Key:
- REGION
- Click Add.
- Click Create.
- Click View task definition.
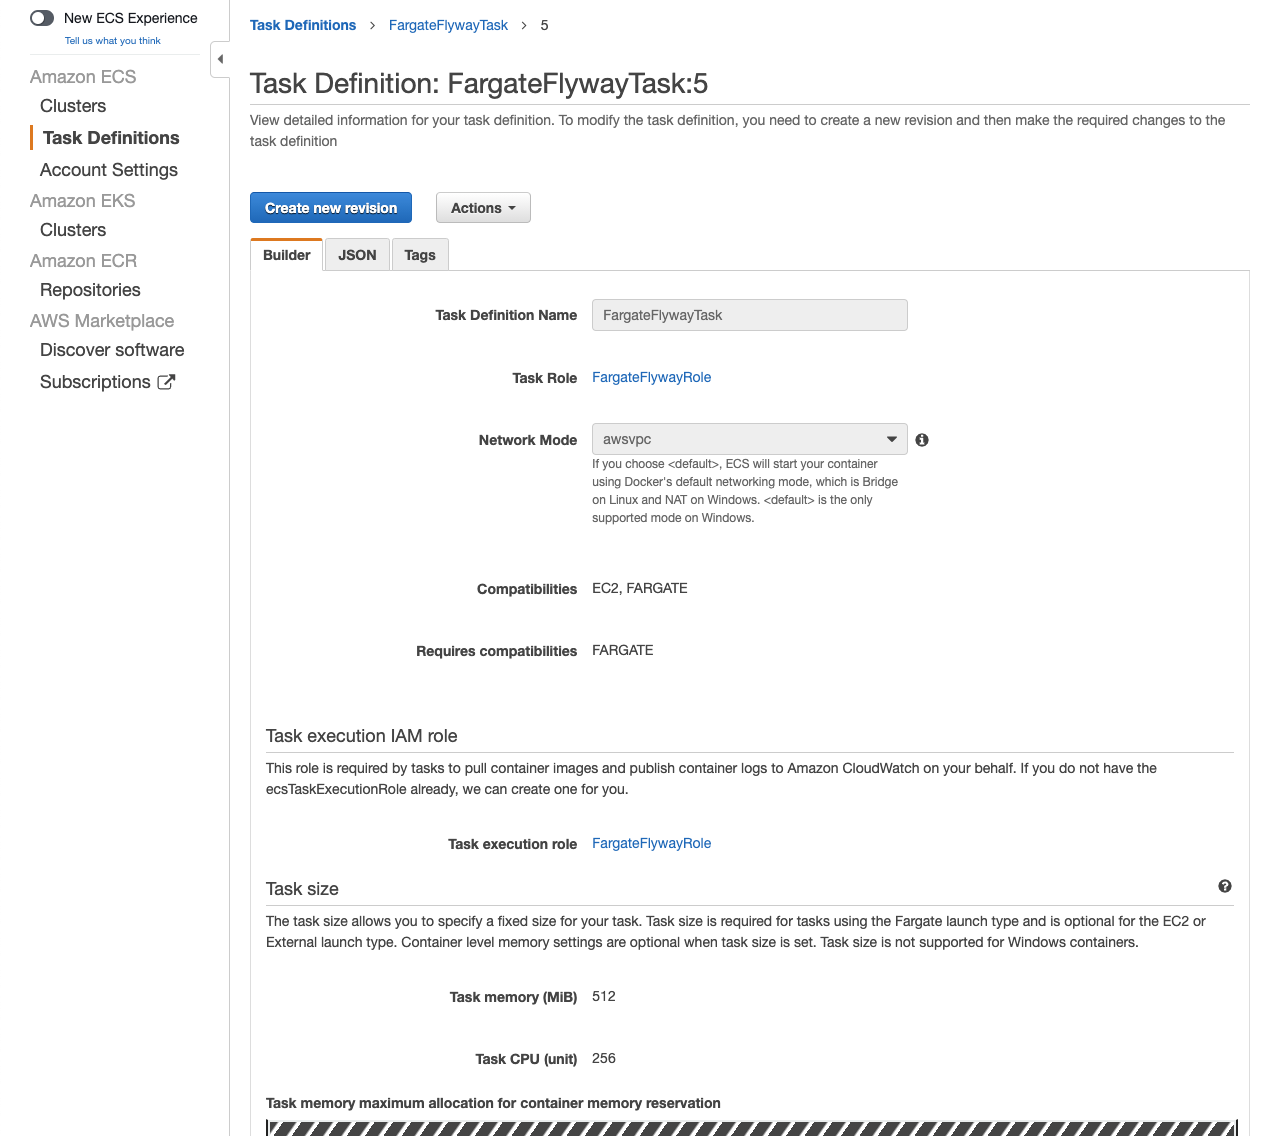
Running Flyway from a Fargate Task
We are finally setup and ready to run our Fargate Flyway task on our Aurora Serverless Database! Let’s get started.
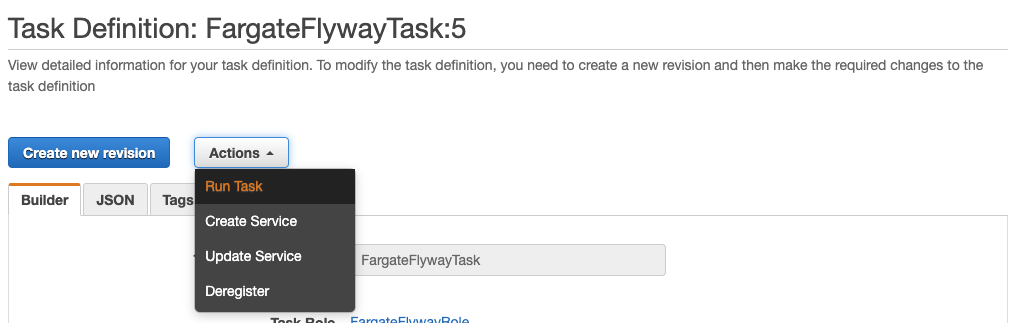
- If you are not already there, navigate to Amazon ECS > Task Definitions.
- Click on the task definition you just created.
- Click on the task definition revision you wish to run. There should only be one since we just created it and haven’t made any changes to it.
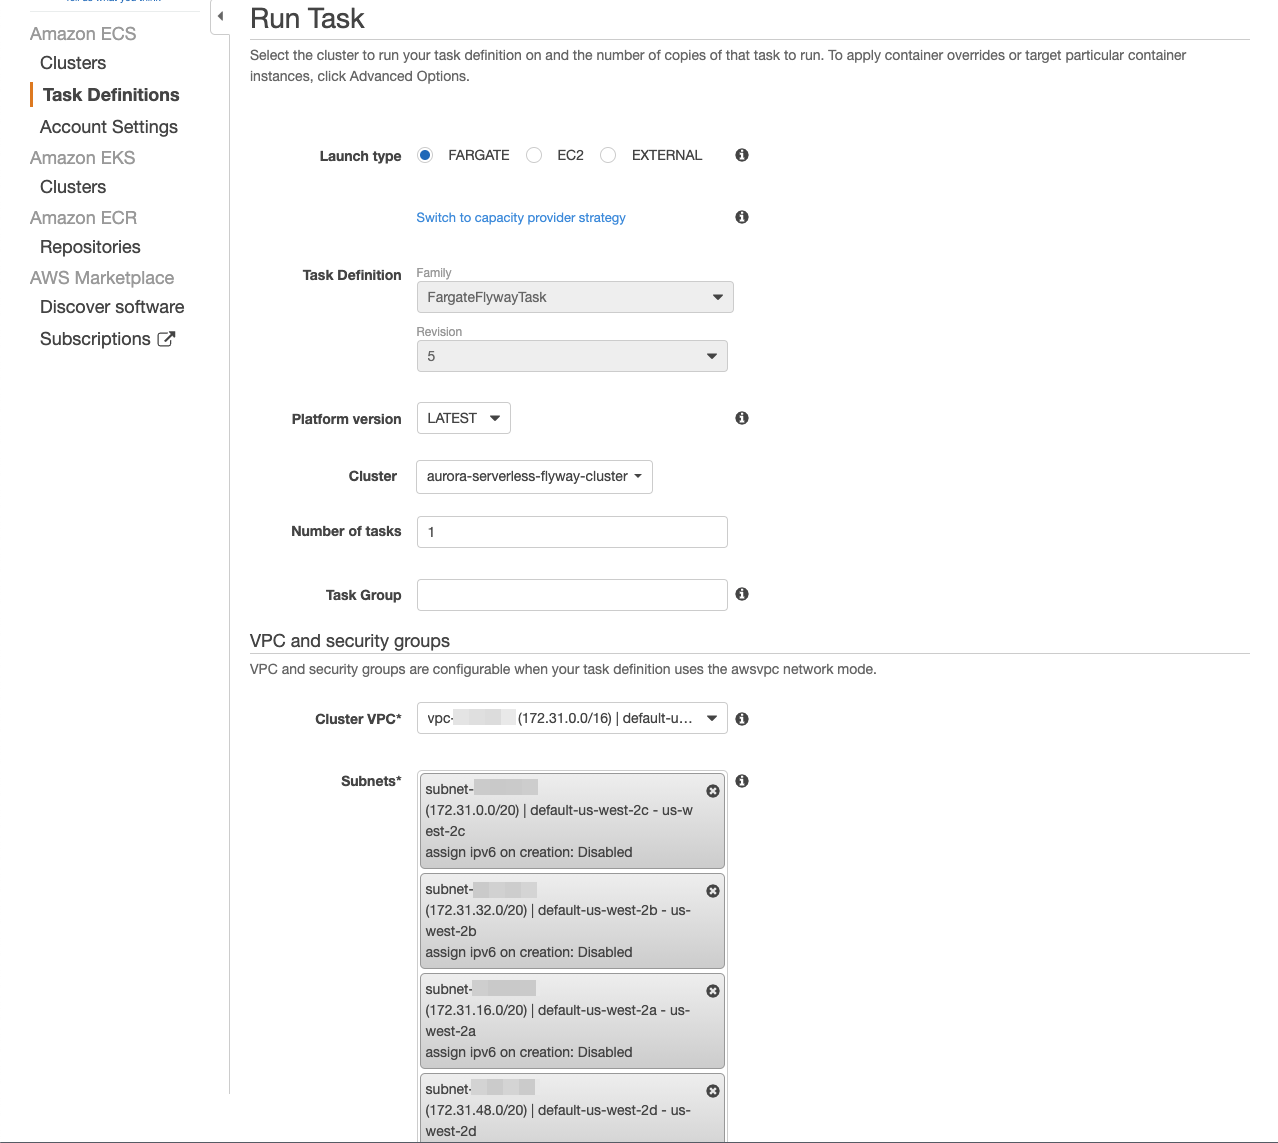
- Click Actions and select Run task.
- For Launch type select FARGATE.
- For Cluster select the ECS Cluster you created in the previous section.
- For Cluster VPC select the VPC that your Aurora Serverless Database is in.
- For Subnets select the subnets in the DB Subnet Group used by your database.
- Next to Security groups click Edit.
- For Assigned security groups select Select existing security group.
- From the Existing security groups list, select the security group that was created when we created the database.
- Ex:
aurora-serverless-flyway-db-sg 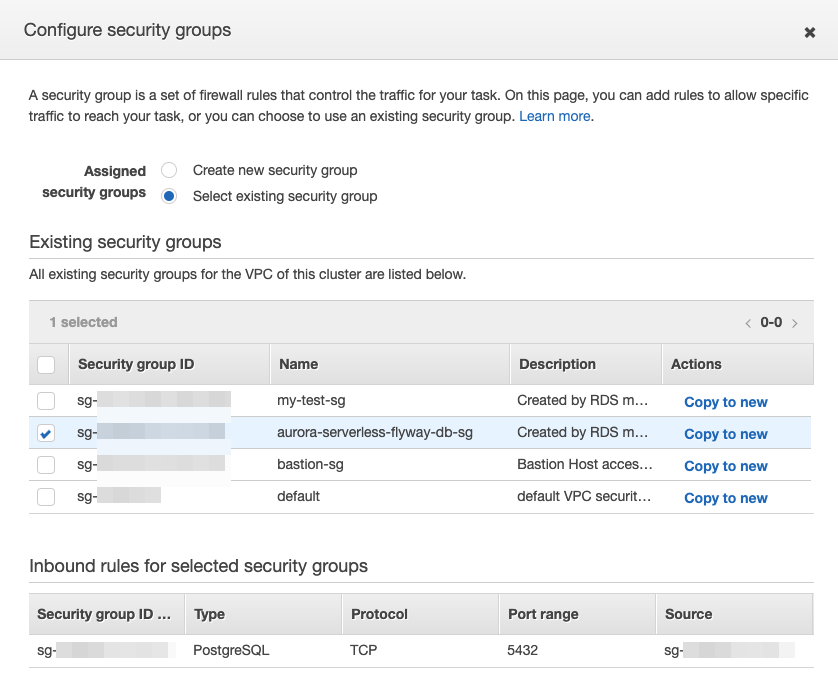
- Ex:
- Click Save.
- Click Run Task.
- Click on the Task ID for your generated task.
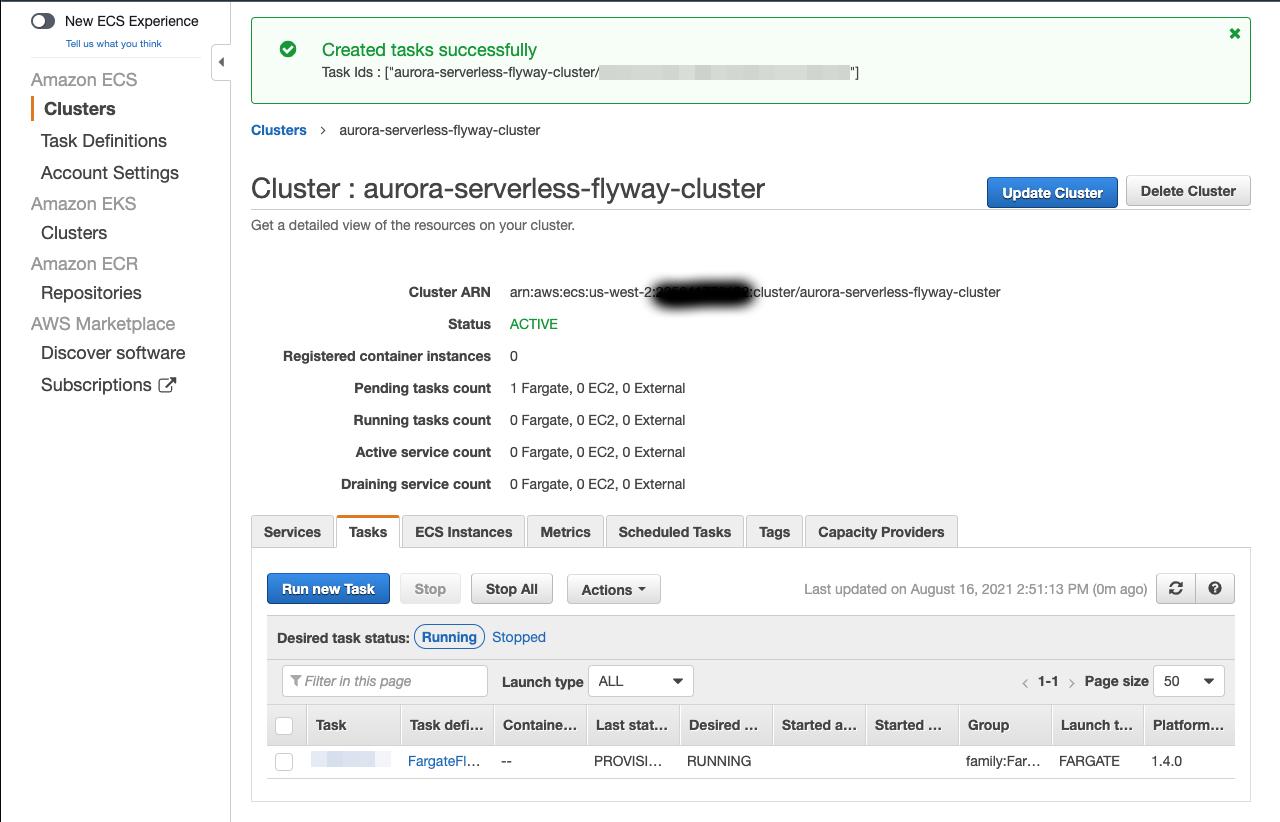
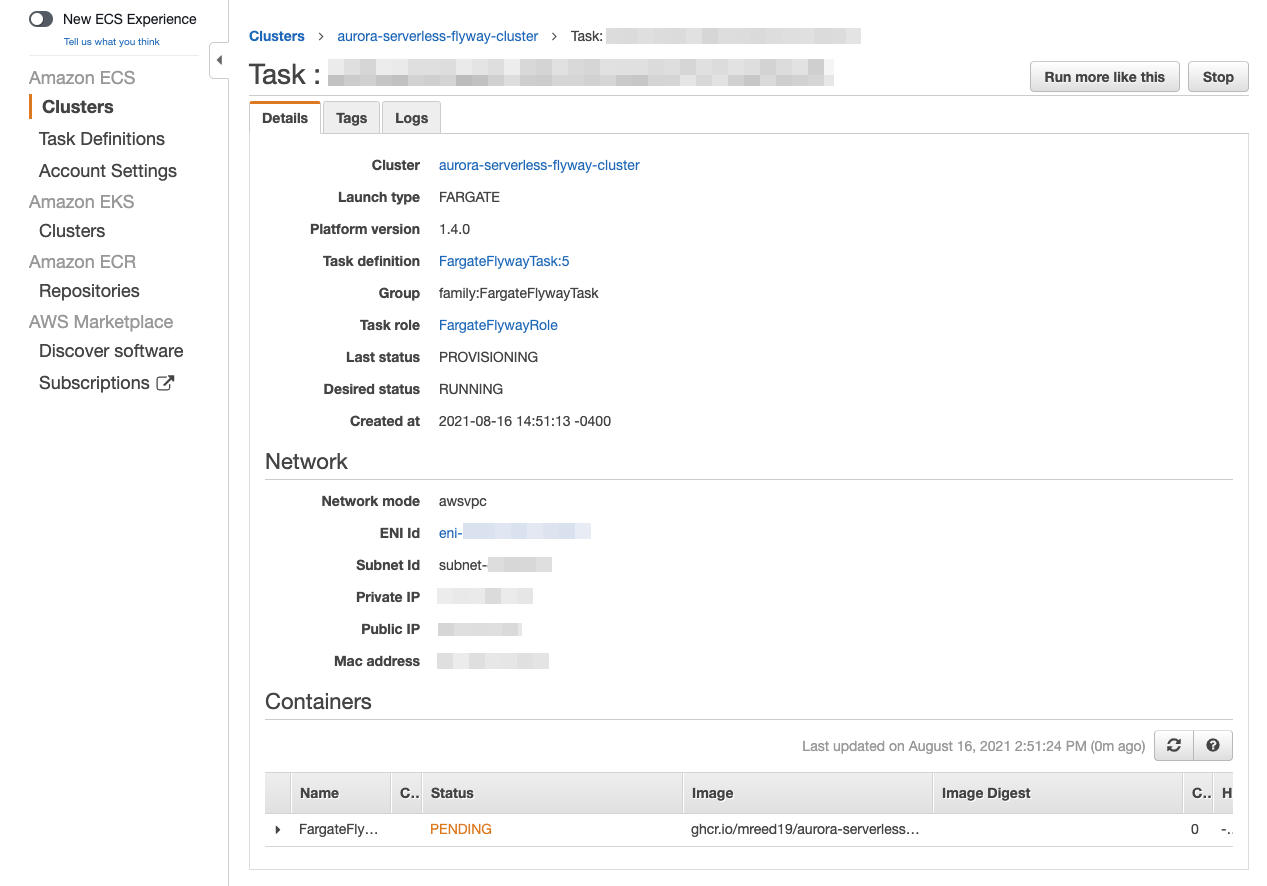
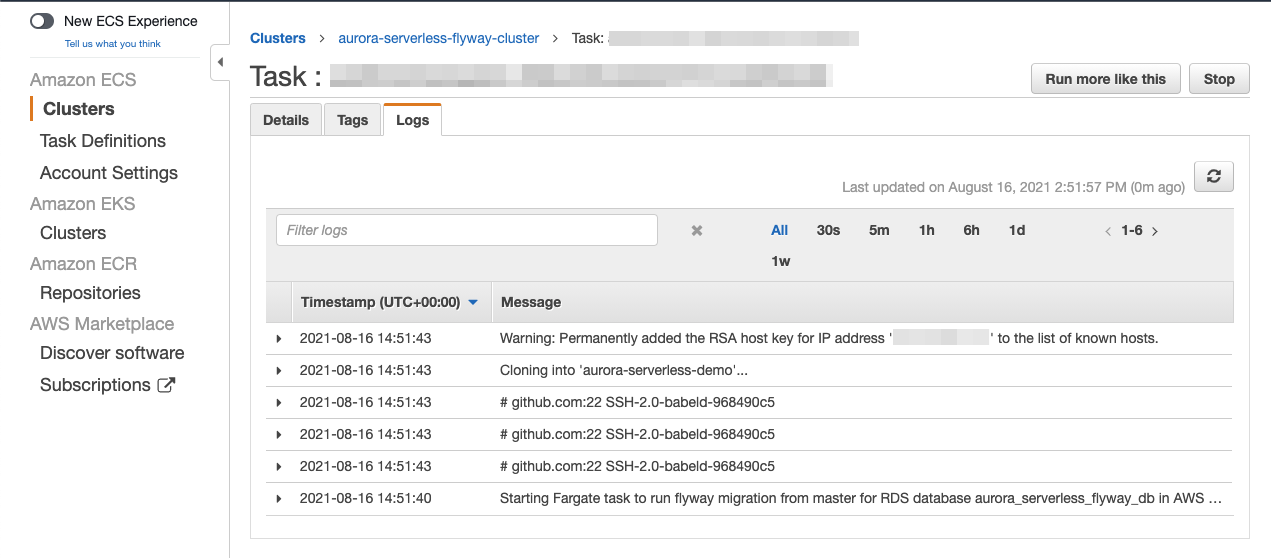
From here you can monitor your task progress. Refresh it until it has a Status of RUNNING. If you would like to see the output of your task, click the Logs tab.
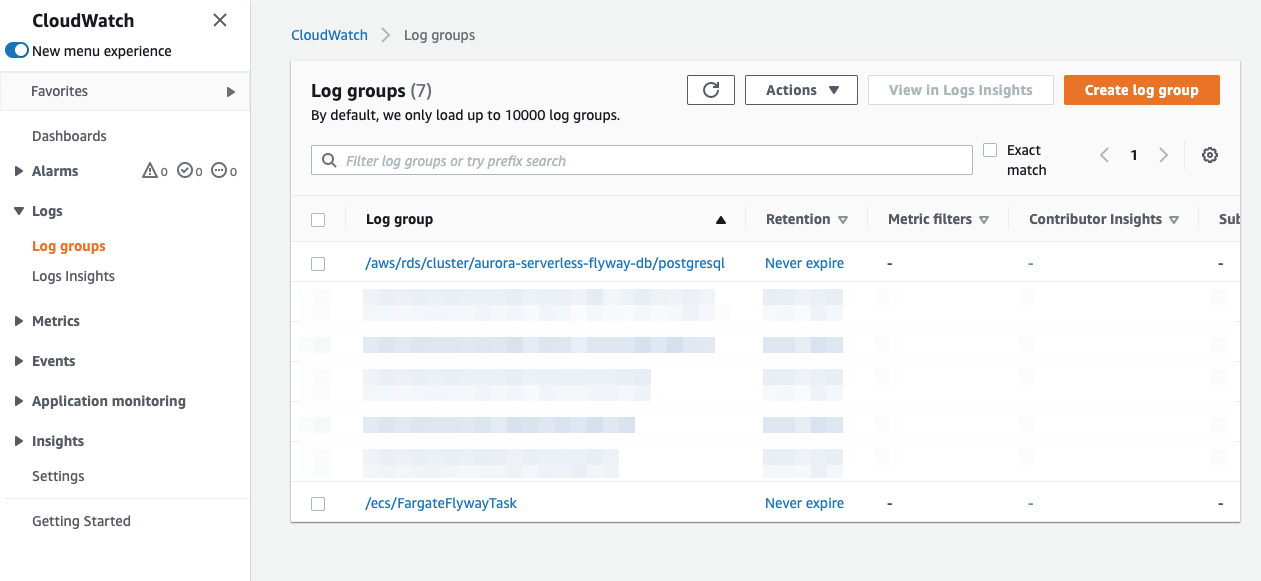
You can also view the logs in CloudWatch by:
- Navigate to CloudWatch.
- Select Log groups from the side menu.
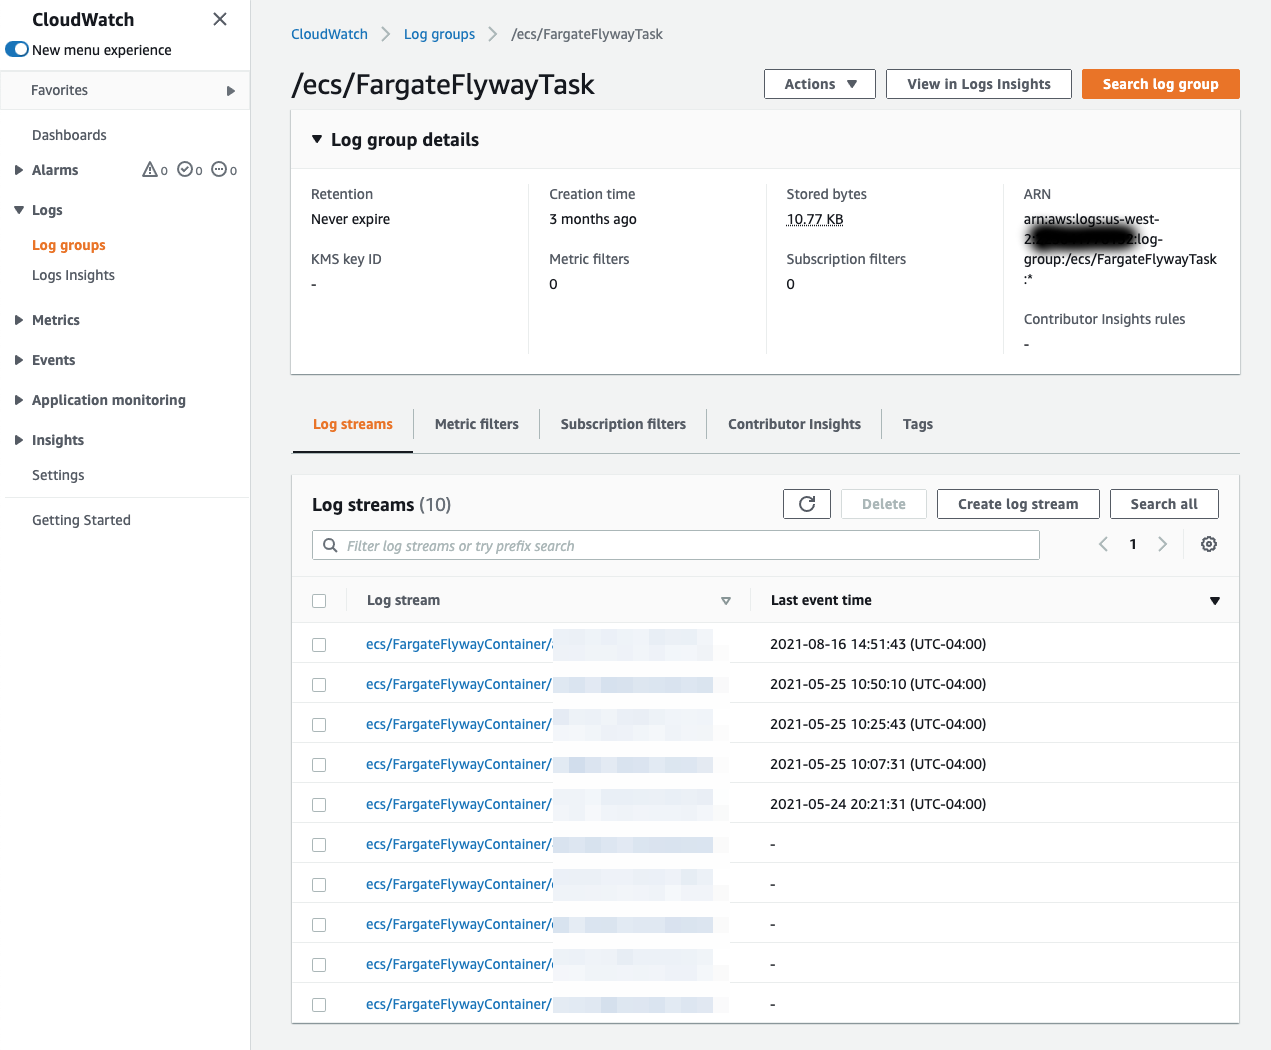
- Select the log group for your task.
/ecs/<task_name>. - Click Search log group.
- Refresh and adjust the time filters as necessary.
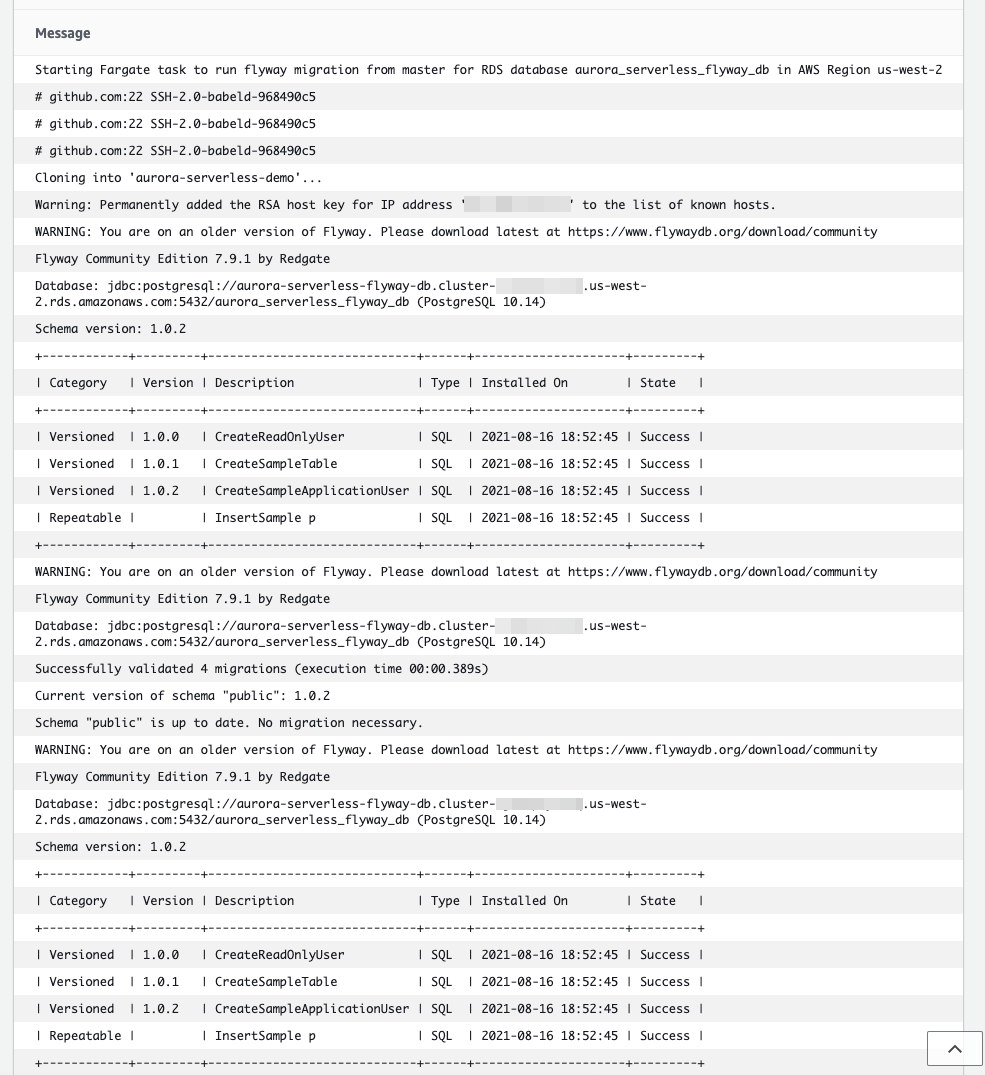
You should be able to see Flyway running successfully on your RDS database!
Running Flyway Migrations from a Git Branch
If you looked carefully at the task logs you should have seen a message from the migrate command that said Schema “public” is up to date. No migration necessary.. This is because we already ran our migrations on our database earlier using docker and our SSH tunnel. If you remember from creating our docker image, we had it set up to pull the most recent SQL code we have on GitHub. So let’s go ahead and add another migration to our GitHub repository. I will also show you how to commit this migration to a branch other than master and still have Fargate pull that version. This could be useful for having a development branch corresponding to a database in a development environment.
First, let’s create a new branch.
git checkout -b develop
Then, create a new sql migration. This will be another simple migration to just create a new table.
V2.00__CreateProductTable.sql:
CREATE TABLE product (
  id SERIAL PRIMARY KEY,
  name VARCHAR,
  weight_lbs NUMERIC,
  units INTEGER
);
Stage and commit this file to your develop branch. Then push your develop branch to your repository.
git add .
git commit -m "Add product table migration"
git push -u origin develop
Now we are going to run our task again with one minor change. Follow the same steps we took to run our task, but before we click Run Task, we are going to expand the Advanced Options section. From here, expand your conatiner name under Container Overrides. In Command override, type the branch name you would like to run the migration from, develop in this case.
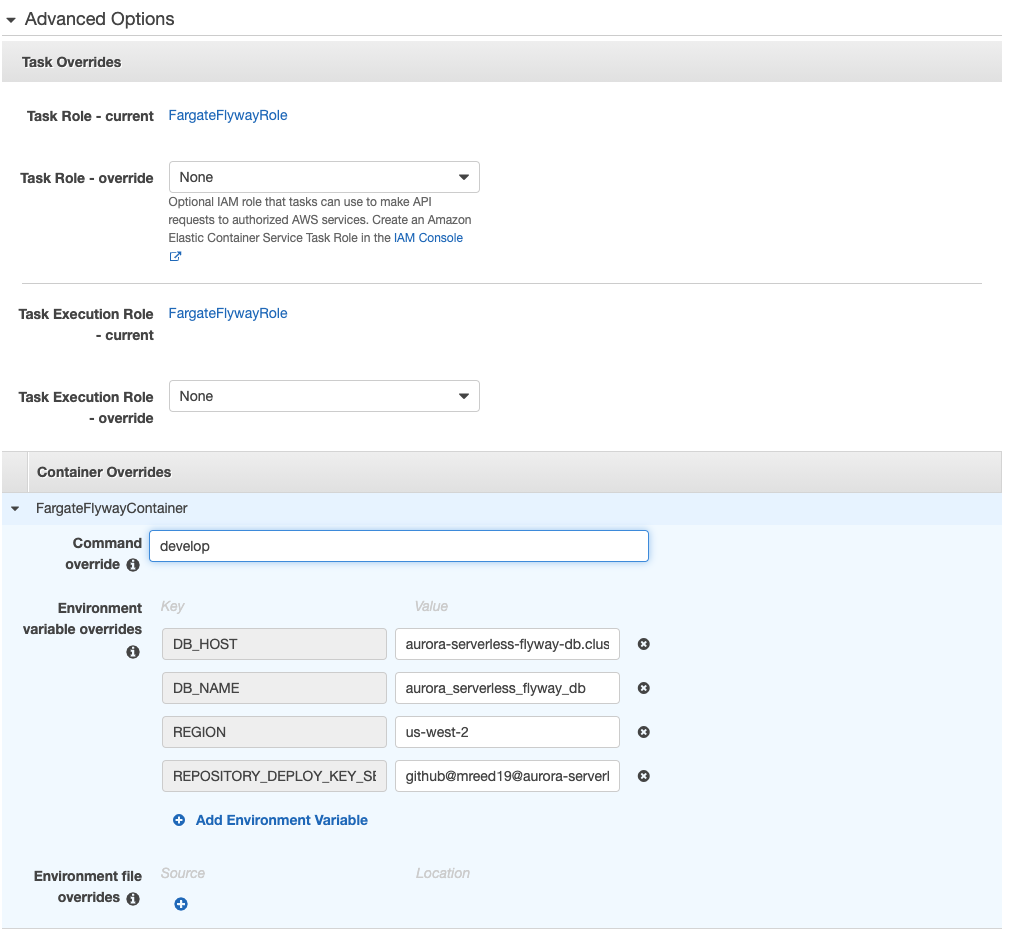
This will specify the CMD argument for our docker container as ["develop"]. Because we have our image ENTRYPOINT as ["./flyway-rds-migration.sh"], the command that our container will actually run will be ./flyway-rds-migration.sh develop. If you look at the code in flyway-rds-migration.sh, you will see that the github_branch variable that is used to pull a specific branch from GitHub is set to either the first argument passed in to the script or it defaults to master. So now that we are passing develop in as the first argument to that script, the container will clone just our develop branch and use that to run the Flyway migrations.
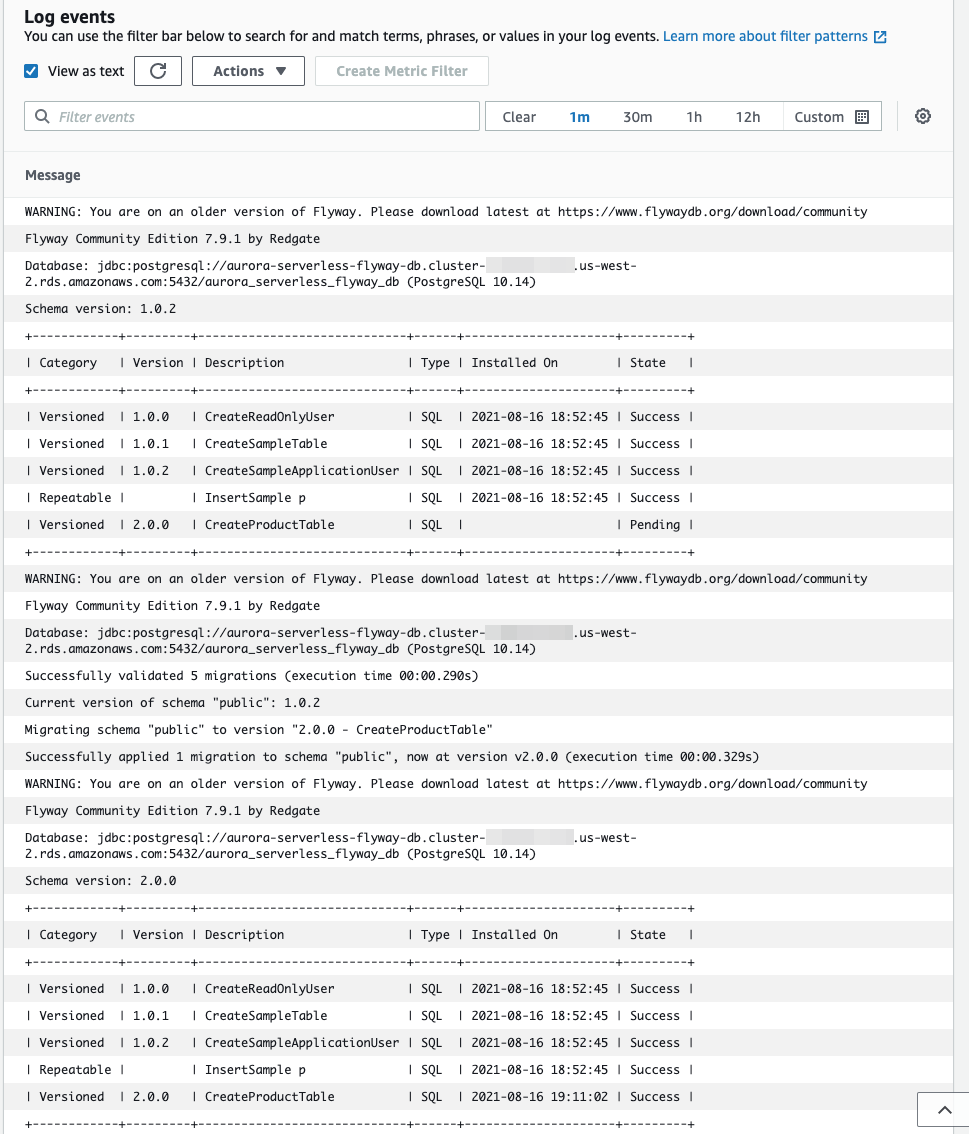
Once that is set, click Run Task. Monitor the task and logs to see what is actually run. You should see the message stating that the migration is being run from develop. You should also see that at first your new migration status is Pending, the migration command migrates your new version, and finally your new migration status is Success. If you reconnect to your database in pgAdmin (keeping in mind to establish your SSH Tunnel), you should be able to see your new product table under the Schemas > public > Tables.
Congratulations! You are now able to run Flyway migrations on an AWS Aurora Serverless Database from AWS Fargate by pulling SQL code from GitHub.
Wrapping Up
In this tutorial, you learned how to create an Amazon Aurora Serverless Database running PostgreSQL, how to create and use a Bastion Host to establish an SSH Tunnel to connect to an Aurora Serverless Database from outside of a VPC, how to manage database code by using Flyway and migrations, how to use Docker Compose to create a local database and run Flyway on it, how to create and use GitHub Deploy Keys and Personal Access Tokens and store sensitive information in AWS Secrets Manager, how to create a Docker image to get secret values and passwords from Secrets Manager and pull SQL code from GitHub to run Flyway migrations, how to store the image with GitHub Container Registry, and finally how to use AWS Fargate to use the image from GitHub Container Registry to run Flyway migrations on an AWS Aurora Serverless Database.
While this is quite a bit of setup, it has definitely made our lives easier here at ShareBuilder 401K and has improved our our ability to iterate on our database models and develop new features for our sites. If you would like to continue to learn more about how we use Flyway and Aurora Serverless, check out the Aurora Serverless Flyway DB template project. This uses all of the topics we went over here and more like managing infratructure with Terraform and using GitHub Actions for CICD pipelines to deploy and destroy infrastructure, build and push the custom Flyway Docker image, run Flyway migrations, create snapshots and restore databases from them, and even generate markdown from the database schema and add it to the README.