Integrating Flyway with Aurora Serverless and AWS Fargate - Part 1 - Database Setup

Contents
Creating an Aurora Serverless Database
This section will go over creating an Aurora Serverless Database. For the purpose of this tutorial we will just be using the Amazon provided default VPC and Subnets. You may use your own VPC and subnets so long as they have outbound internet access for the Fargate task that we will create later. While the default subnets are public, private subnets will work for this as well because Aurora Serverless Databases can only be accessed from the same VPC anyway. You can find more information about the limitations of Aurora Serverless here.
- Open the AWS Management Console.
- Navigate to RDS.
- Click Create database.
- Select Standard create under Choose a database creation method.
- For Engine options select the following:
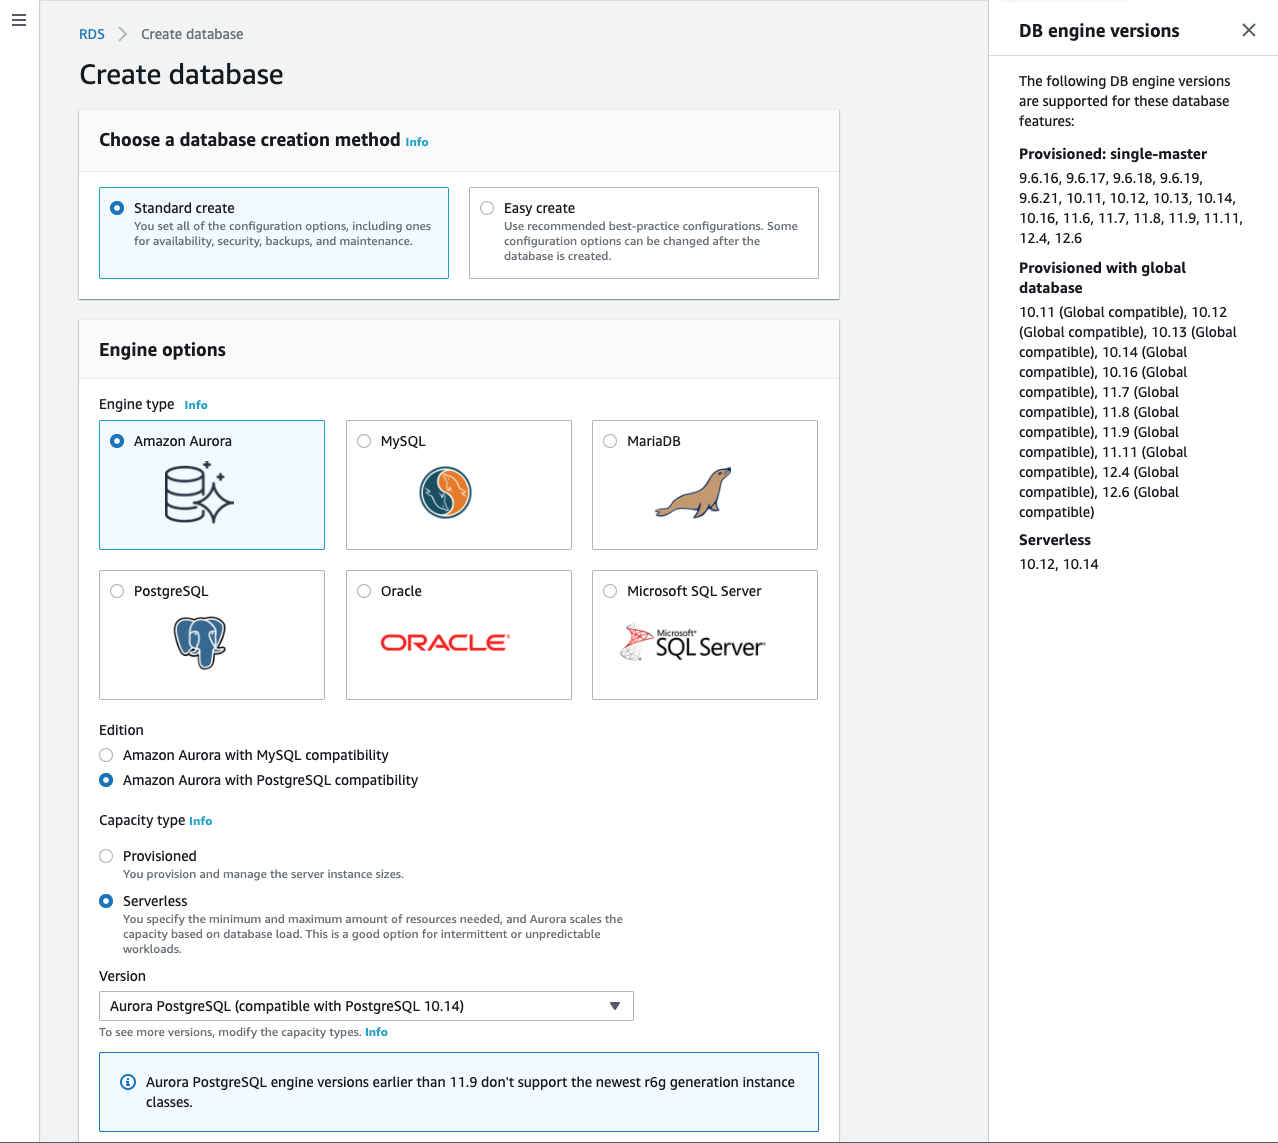
- Engine type:
Amazon Aurora - Edition:
Amazon Aurora with PostgreSQL compatibility(This tutorial uses PostgreSQL but MySQL is also compatible with Flyway) - Capacity type:
Serverless - Version:
Aurora PostgreSQL (compatible with PostgreSQL 10.14)
- Engine type:
- For Settings provide the following information:
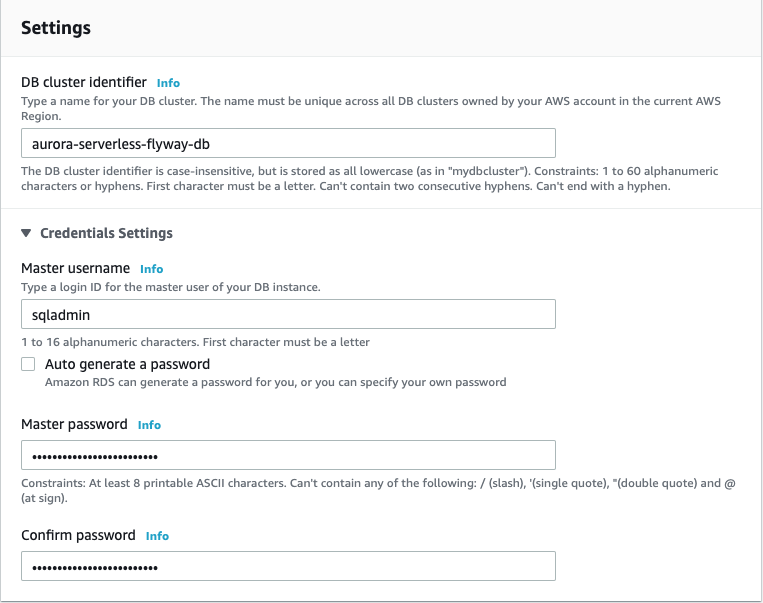
- DB cluster identifier:
aurora-serverless-flyway-db(you can use whatever name you want) - Master username:
sqladmin(This can also be whatever you want but the Flyway SQL code and AWS Secretsmanager sections of this tutorial will assume there is a sqladmin user) - Master password: A secure master password. Save this somewhere as we will be storing it in AWS SecretsManager later.
- The following command will generate a random password:
openssl rand -base64 29 | tr -d "=+/" | cut -c1-25
- The following command will generate a random password:
- Confirm password: The same password as above
- DB cluster identifier:
- Set Capacity settings. These can be adjusted as you see fit but I will use the following configuration:
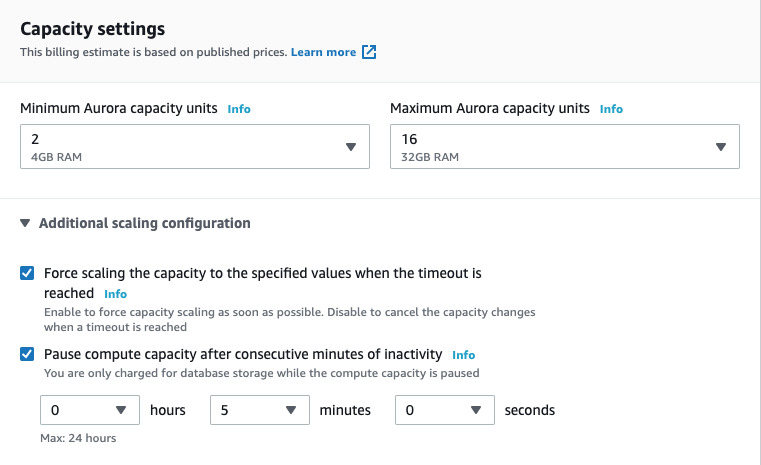
- Minimum Aurora capacity units:
2 - Maximum Aurora capacity units:
16 - Expand the Additional scaling configuration section.
- Select Force scaling capacity to the specified values when the timeout is reached.
- Select Pause compute capacity after consecutive minutes of inactivity.
- Set the auto pause time to
5minutes
- Minimum Aurora capacity units:
- Use the following Connectivity settings:
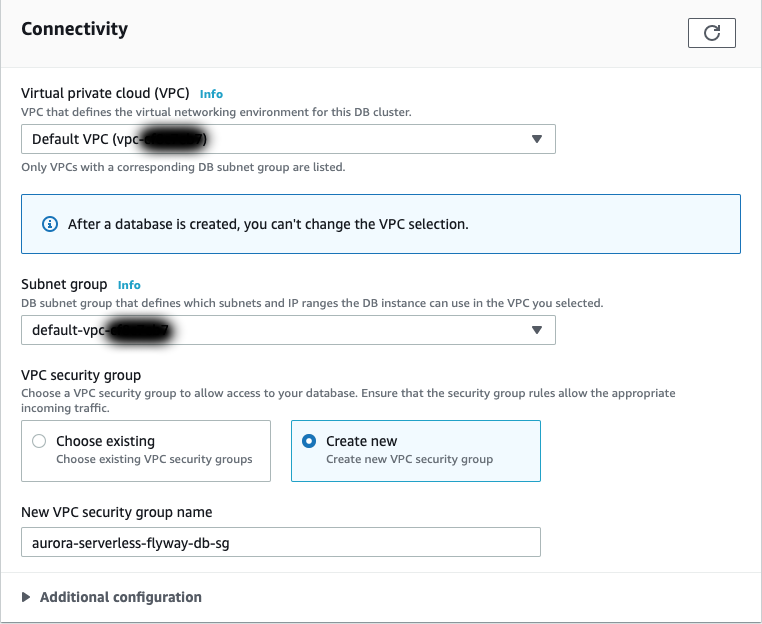
- Virtual private cloud (VPC):
Default VPC - Subnet group:
default - VPC security group:
Create new - New VPC security group name:
aurora-serverless-flyway-db-sg(Can be whatever. It is helpful to have the name relate you your DB cluster identifier)
- Virtual private cloud (VPC):
- Under Additional configuration set:
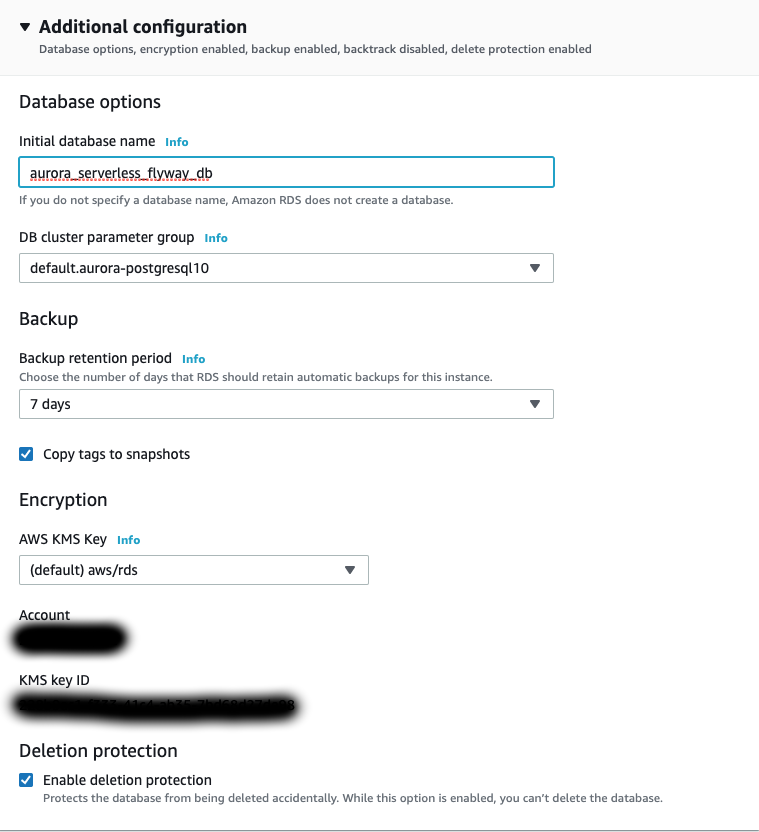
- Initial database name:
aurora_serverless_flyway_db(Can be whatever. This is the name of the database on the cluster that we will connect to and have Flyway work with)
- Initial database name:
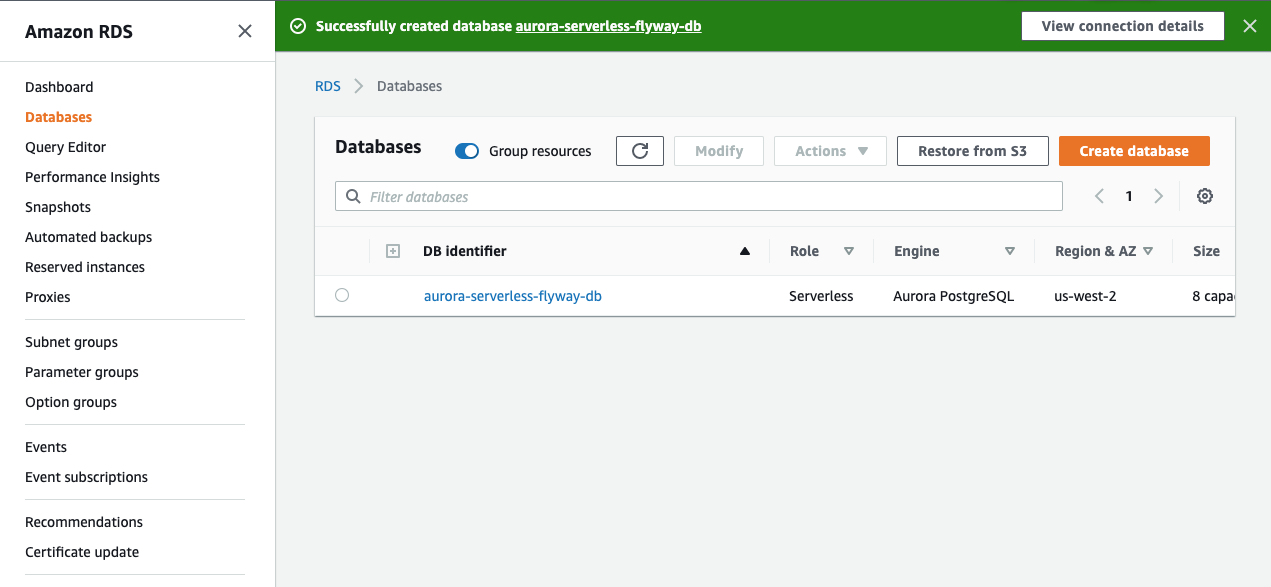
- Click Create database.
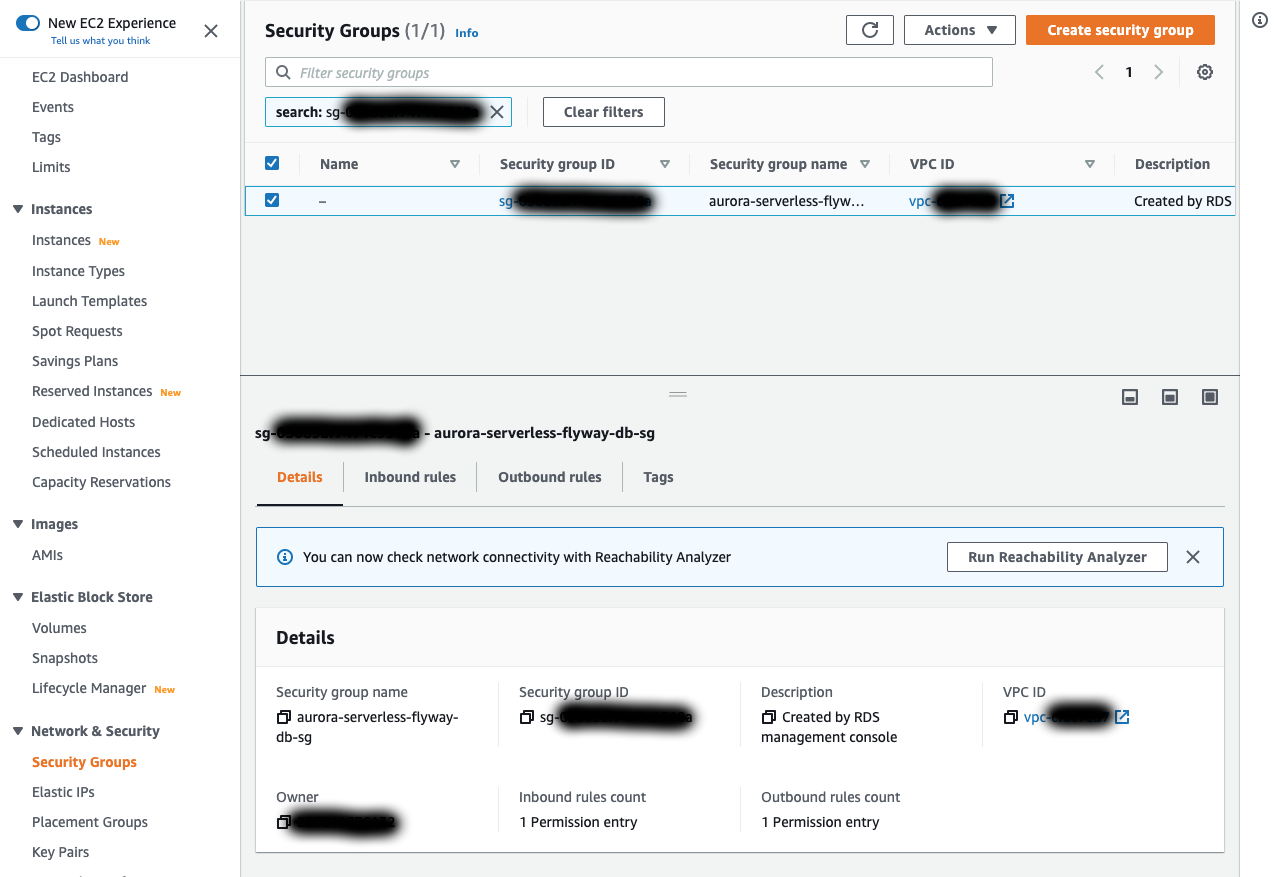
While we are waiting for the database to be created, we can go ahead and modify the security group that we created during setup. To see the details of the database, click on the DB identifier that was just created.
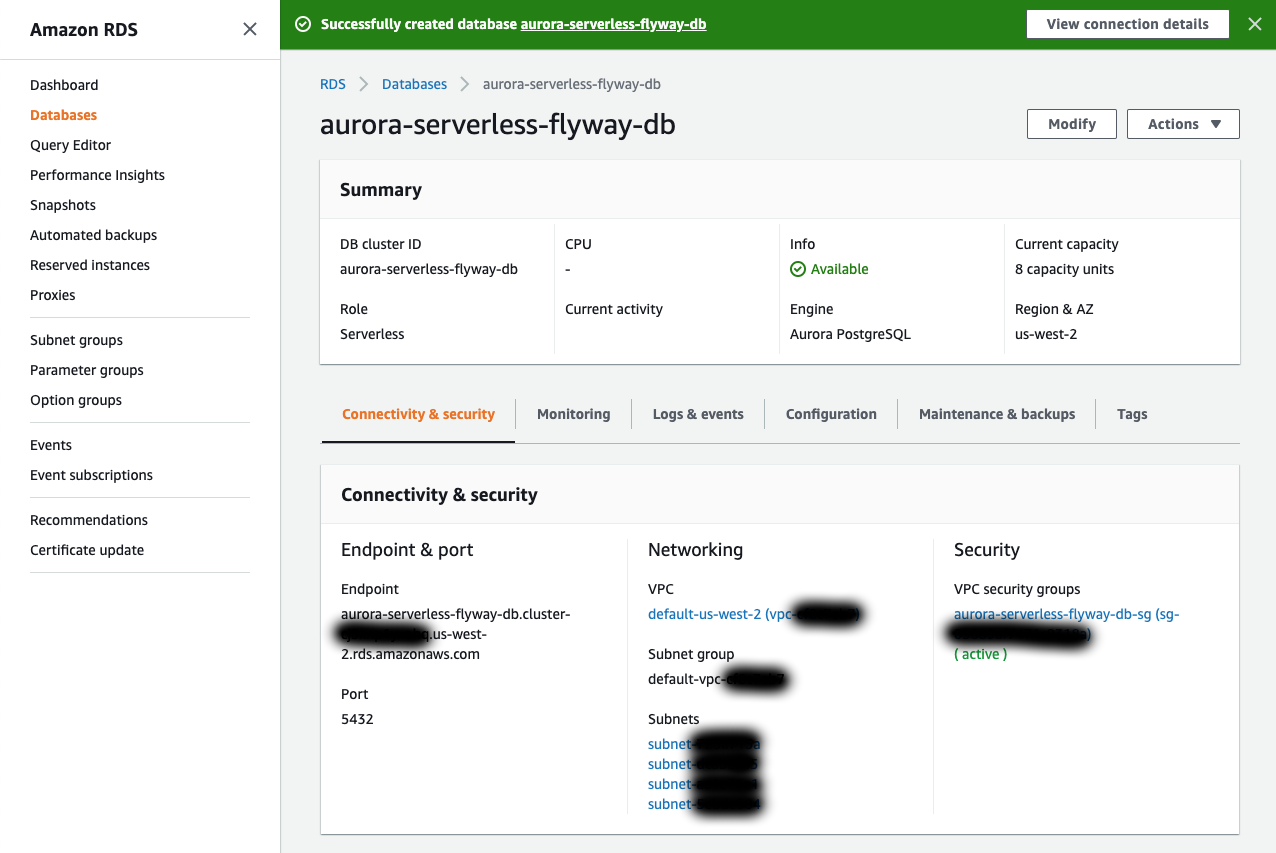
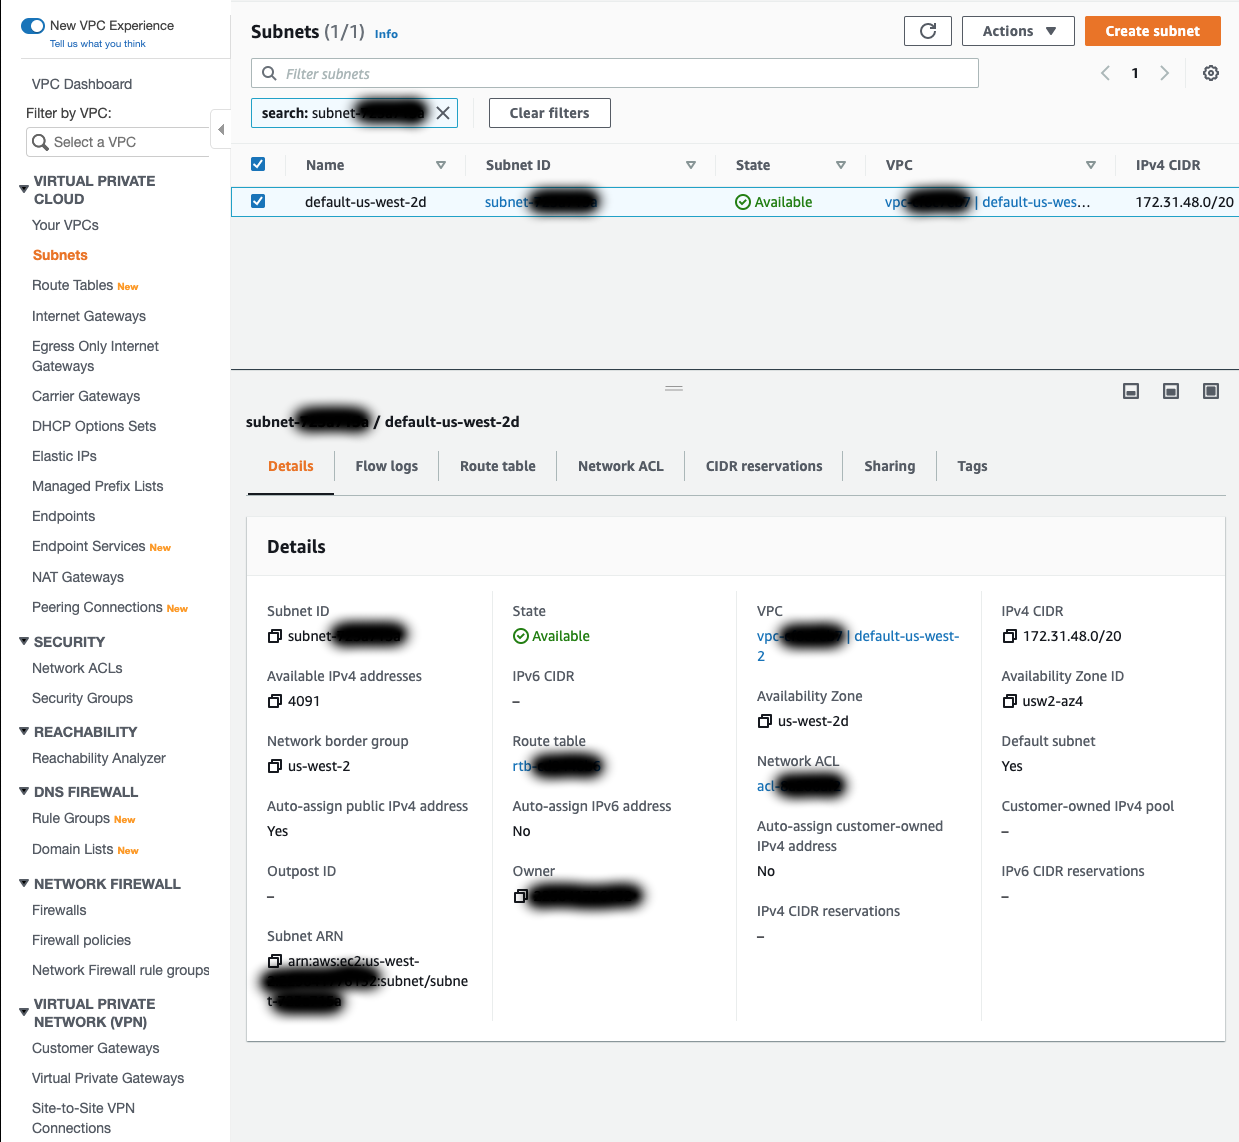
Before modifying the security group, it would be best to get the CIDR block from each of the subnets used by the database. Under Networking and Subnets, click on each subnet name to view it in the VPC Dashboard (I recommend opening each of these in a new tab). From here, click on the Subnet ID to view the subnet details and copy down the IPv4 CIDR value. Save these values for each subnet.
Back in the database view, click on the name of the security group that was created in the Connectivity and security under VPC security groups. This will take you to the EC2 Dashboard with the Security Group focused.
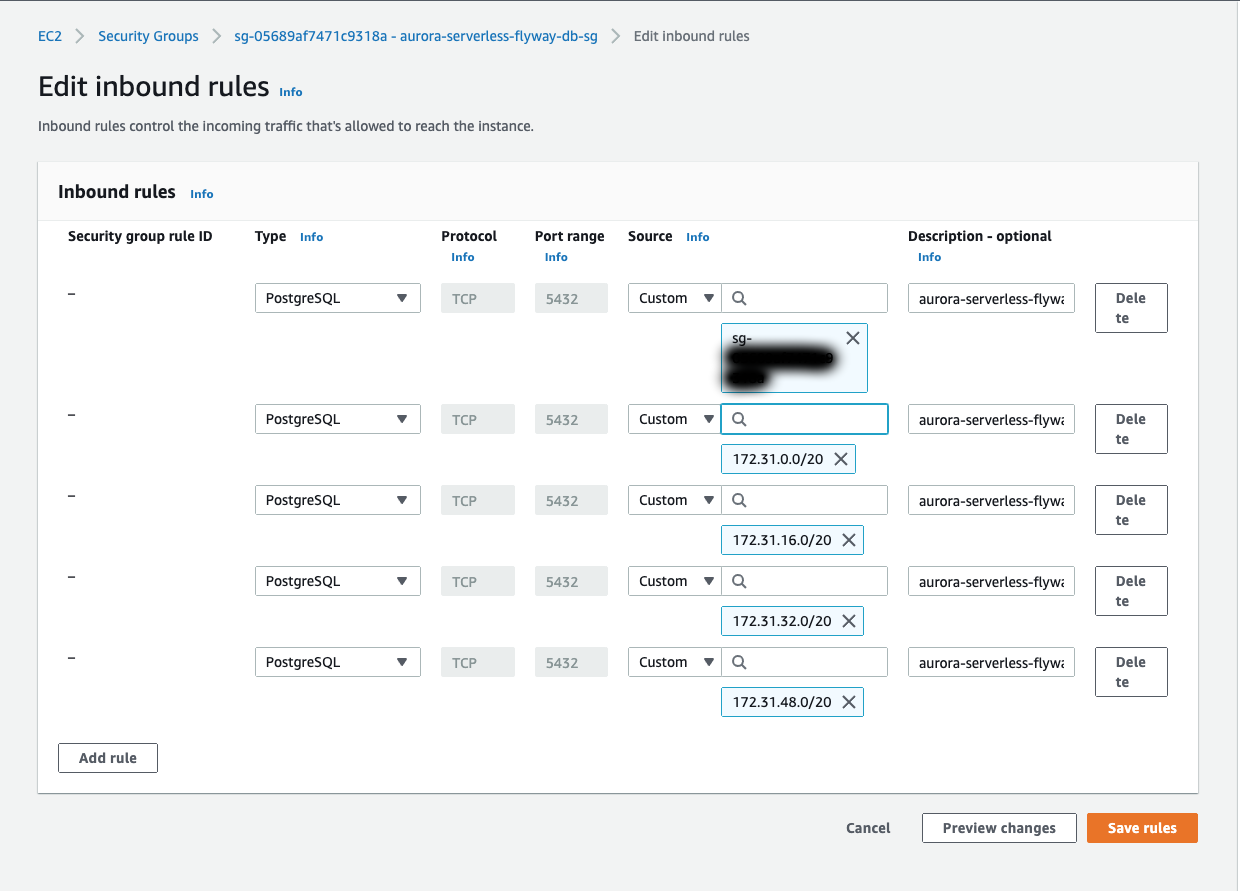
Click on Inbound rules and then Edit inbound rules. Delete the rule that is already there. Then click Add rule to add a new rule. The rules that we are adding are as follows:
- Self-Ingress:
- Type:
PostgreSQL - Protocol:
TCP - Port range:
5432 - Source:
Custom- In the search field, select the name of this security group
- Description:
aurora-serverless-flyway-db-sg self-ingress
- Type:
- Subnet Ingress:
- Type:
PostgreSQL - Protocol:
TCP - Port range:
5432 - Source:
Custom- In the search field, copy one of the CIDR blocks that you saved from the Subnets. Repeat for each of the other subnets and their CIDR block
- Description:
aurora-serverless-flyway-db-sg default subnets ingress
- Type:
Once these rules have been added, click Save rules.
Bastion Host Setup
Now that we have our database setup we should be able to connect to it, right? Not so fast! As I mentioned at the start of the Database Setup section, Aurora Serverless can only be accessed from the same VPC. This means that we will need something in the VPC to act as a sort of bridge for our connection. There are many ways to do this including setting up a VPN and connecting that to the VPC. For this tutorial, we will just create a Bastion Host in the VPC.
A Bastion Host, or Jump Box, is essentially a server in the network or VPC that can be accessed from outside the VPC. Once the connection is established, services inside the VPC can be accessed. In this particular example, we will be creating a Linux EC2 instance in the VPC that can access the Aurora Serverless Database. We will then create an SSH Tunnel to connect to the database through our Bastion Host instance.
- In the AWS Management Console, navigate to EC2.
- Click Launch Instance.
- Click Select for the Amazon Linux 2 AMI (HVM), SSD Volume Type AMI.
- Select the t2.micro instance type and click Next: Configure Instance Details.
- The defaults here should all be fine. Just make sure of the following settings:
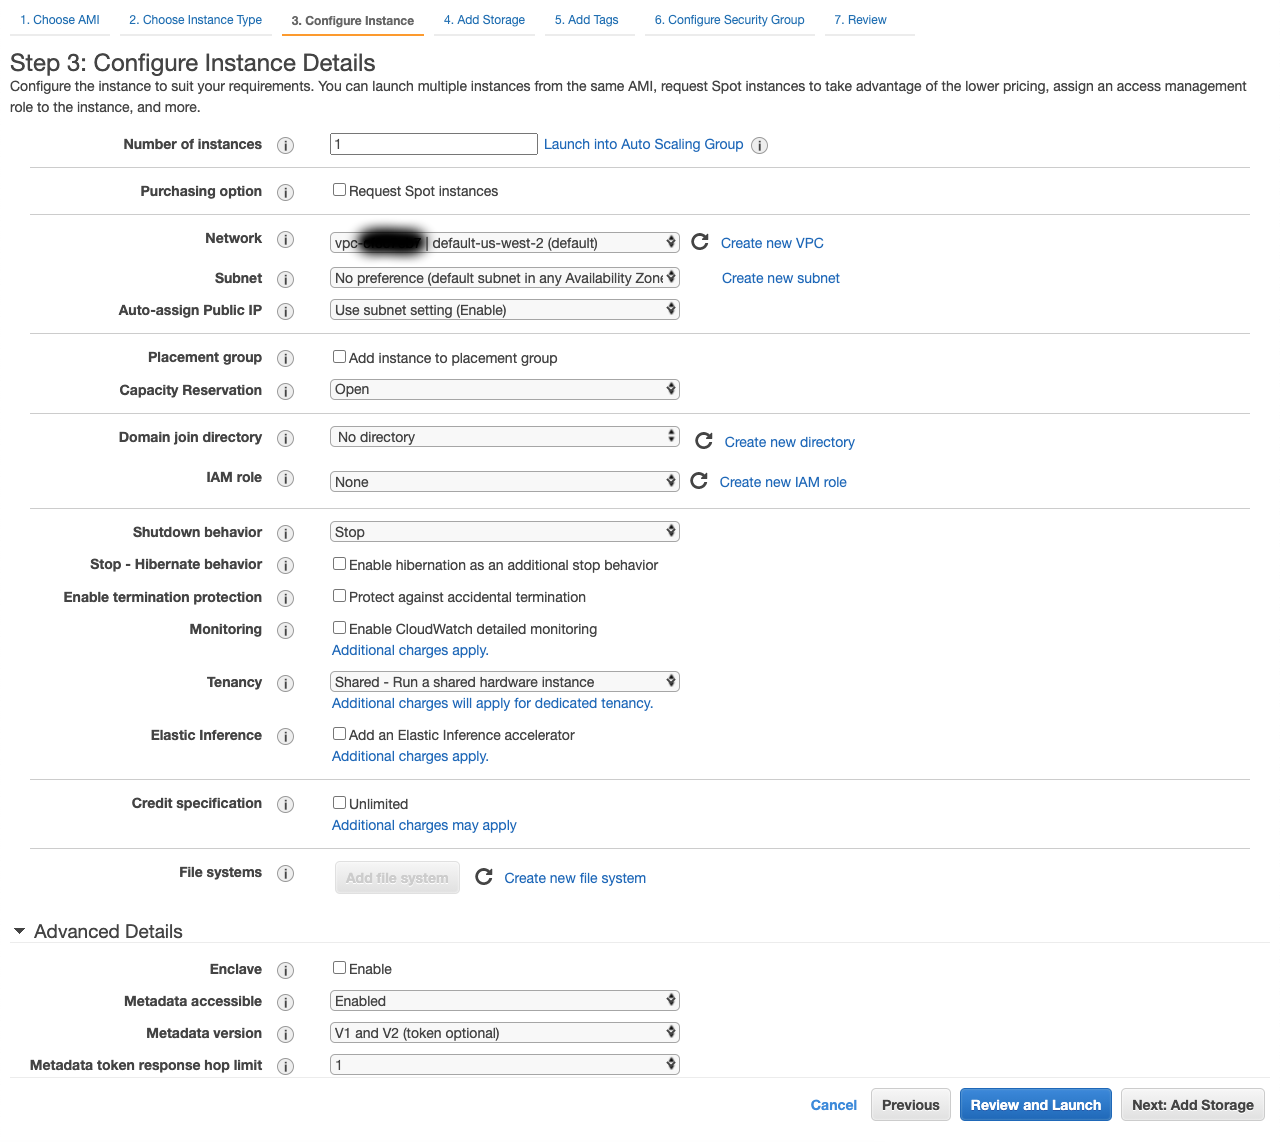
- Number of Instances:
1 - Network: The same VPC you set up the database in.
default-us-west-2in my case. - Subnet:
No preferenceor a particular subnet so long as it is in your DB Subnet Group. - Auto-assign Public IP:
Use subnet setting (Enable)orEnable. This will give us the IP to connect to from outside of the VPC.
- Number of Instances:
- Click Next: Add Storage.
- Defaults are fine here. Click Next: Add Tags.
- Add any tags you want and click Next: Configure Security Group.
- Under Assign a security group select the Create a new security group option.
- For Security group name enter
bastion-sg. - Add a Description
- For the rule set the following values:

- Type:
SSH - Protocol:
TCP - Port Range:
22 - Source:
My IP(This should automatically get your IP address)- A
customsource can be chosen and a CIDR block entered if you know the CIDR block you wish to use.
- A
- Description:
SSH access from My IP
- Type:
- Click Review and Launch.
- Review the details to make sure everything looks correct. Click Launch.
- A dialog box should appear that says Select an existing key pair or create a new key pair.
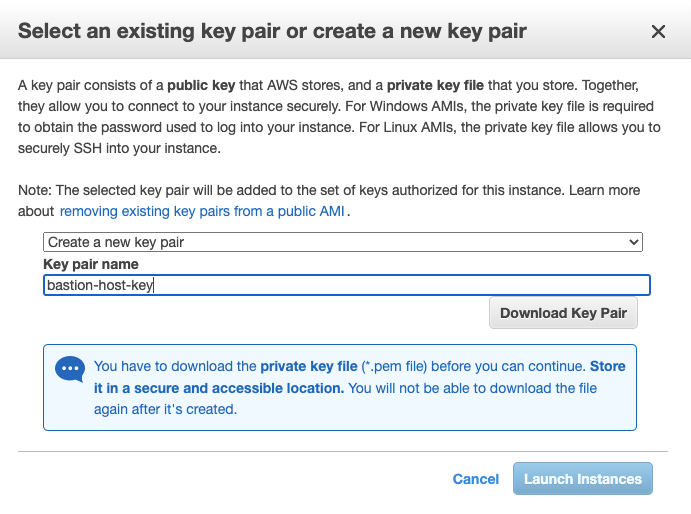
- Select Create a new key pair and enter a Key pair name. (ex:
bastion-host-key). - Click Download Key Pair. Store the
.pemfile in a secure location. - Click Launch Instances.
- Click View Instances.
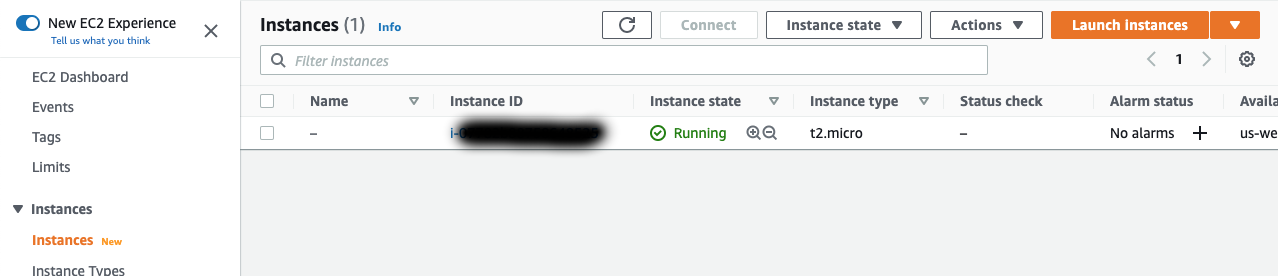
You should now see your created instance under the Instances section. Wait for your Instance state to say Running. Once that is complete we are ready to connect to the database!
Connecting to the Database
In order to connect to the database we will need a client of some sort. PostgreSQL can be downloaded here. This should not only install a PostgreSQL server, but also the psql command line tool and pgAdmin which can be used to connect to the database. If you just wish to download pgAdmin you can do so here. I will be demonstrating connecting to the database with pgAdmin.
Before we make the connection, we need to get the public DNS name of our bastion host instance and the endpoint for our Aurora Serverless database. The bastion host public DNS name can be found back in the instances section of the EC2 console under Public IPv4 DNS. The database endpoint can be found by click the DB identifier of our database in the Databases section of the RDS console. Endpoint is under the Connectivity & security tab.
Now that we have our endpoints, we can create our SSH Tunnel and establish our database connection. Open a terminal and perform the following steps:
- Change the permissions on the
.pemkey file for your bastion host to read-only (0400)-
# Use the path for wherever you stored your key file
chmod 0400 ~/key-files/bastion-host-key.pem
-
- Create your SSH tunnel with the following command
-
# Replace <aurora_serverless_db_endpoint> and <bastion_host_public_dns_name> with the values we grabbed above ssh -i ~/key-files/bastion-host-key.pem -L "5432:<aurora_serverless_db_endpoint>:5432" "ec2-user@<bastion_host_endpoint>"- If asked about a fingerprint and if you would liket to continue, type
yesand hitenter. - The
-ioption for thesshcommand is used to specify a key file for the connection. - The
-Loption for thesshcommand is used to specify local port forwarding using the formatport:host:hostport. In our case, any connections made to port 5432 on our machine are sent through our SSH server and are forwarded to our Aurora Database Endpoint on port 5432. For more on SSH Tunneling, click here.
- If asked about a fingerprint and if you would liket to continue, type
-
- The tunnel will remain active so long as the connection is still active. To kill the connection just run the
exitcommand.
With our SSH Tunnel established we are ready to connect to our database. Open pgAdmin and perform the following steps:
- Right click Servers and select Create > Server….
- In the General tab, enter a value for Name. This name is what will appear in pgAdmin in the Servers list.
- I just used
aurora-serverless-flyway-dbfor my name.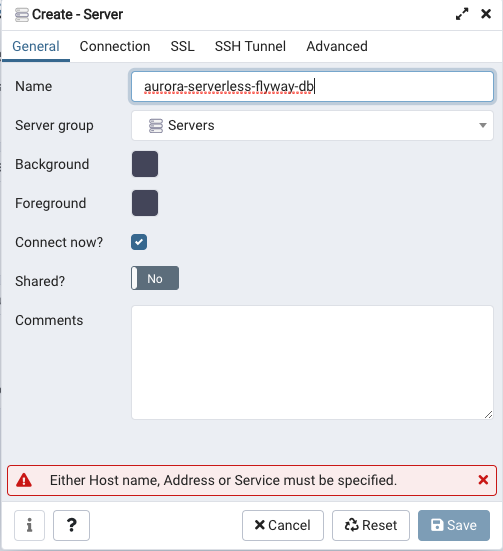
- I just used
- In the Connection tab, enter
localhostfor the Host field.- Remember this will be forwarded through our SSH Tunnel.
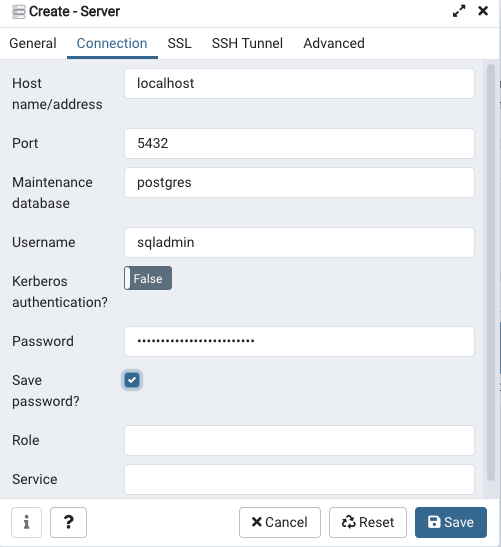
- Remember this will be forwarded through our SSH Tunnel.
- For Username and Password use the Master username and Master password values that were used to create the Aurora Serverless Database.
- Check the Save password? box (Or don’t. Up to you).
- Click Save.
- If there is a timeout expired warning, click OK, wait a few seconds and try again.
- The database might have been paused with 0 Aurora Capacity Units. It might take a second to allocate the Aurora Capacity Units.
If you were able to follow these steps successfully, you should see your database connection appear under Servers. You can click on this to view more details about your connection. If you expand the Databases section, you should see a few databases that RDS creates automatically, as well as the Initial database name you supplied when creating your Aurora Serverless Database.
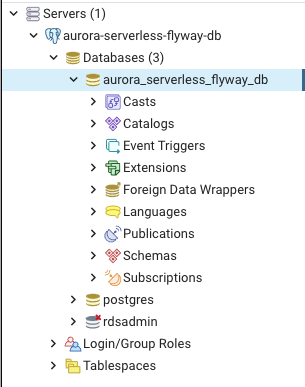
There’s nothing interesting here yet as we haven’t added anything to our database. So let’s take a step back and look at how to apply migrations to a database using Flyway. Go ahead and right-click the server you created and select Disconnect Server. Kill your SSH tunnel by using the exit command in the terminal you established the connection in. Then head on over to the next section.